
Overview
OS Version: macOS Sonoma (14.6)
Typing in Nastaliq (the Urdu script) on your Mac computer is simple to set up and relatively easy to master. Here I'll walk you through how to enable an Urdu keyboard layout, conveniently switch between keyboards, and finally, what software to use for writing in Urdu. The following instructions have been written according to macOS Sonoma (version 14.6). The steps may be slightly different if you are running an older or newer operating system.
Typing in Roman Transliteration
#1 - Enable an Urdu Keyboard
- Go to System Settings
- Click Keyboard
- Click Edit... next to Input Sources
- Click the + sign
- Select Urdu from the list of languages
- Highlight one of the keyboards and then click Add
- You're done!
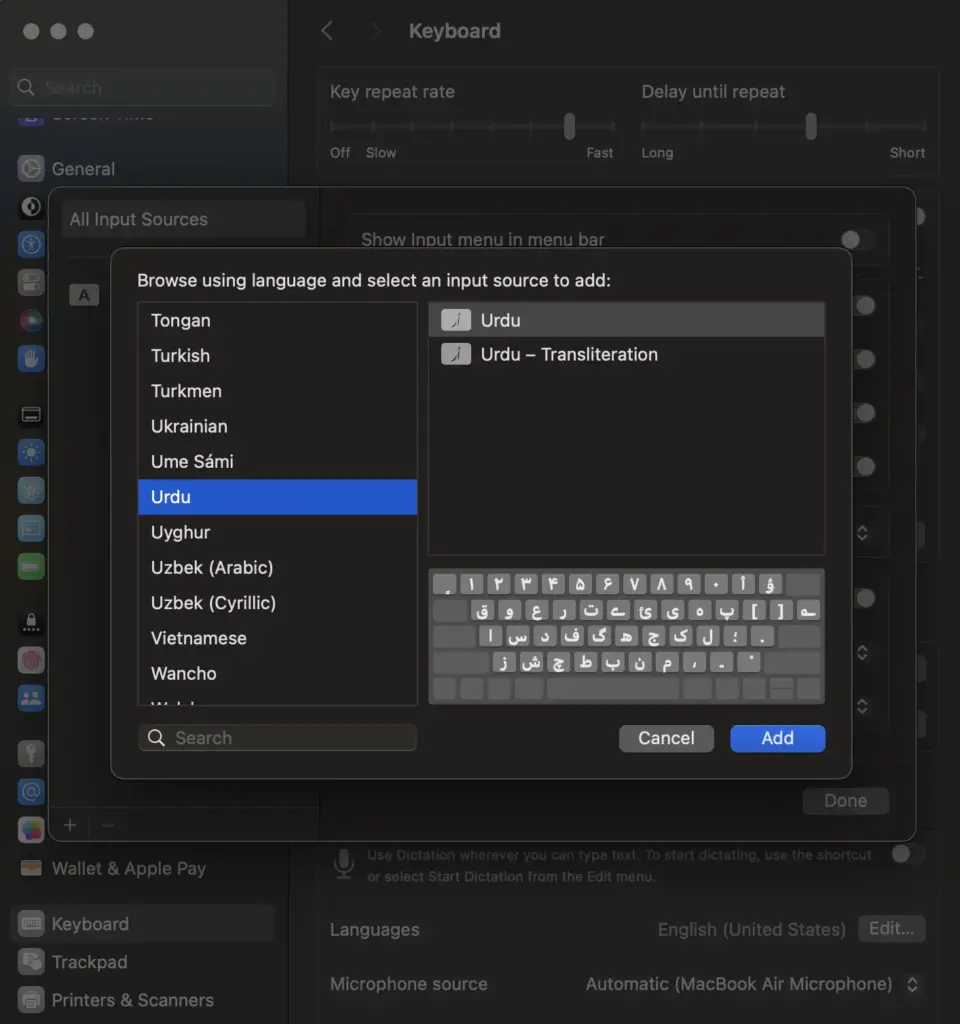
You'll notice that step 6 gives you two different keyboard layout options:
- Urdu
- Urdu — Transliteration
The Urdu option allows you to type faster in Urdu once you've invested the time to learn its layout. Urdu — Transliteration requires you to write in Roman letters while the system guesses what word you're trying to write in Urdu (and it gives you several options).
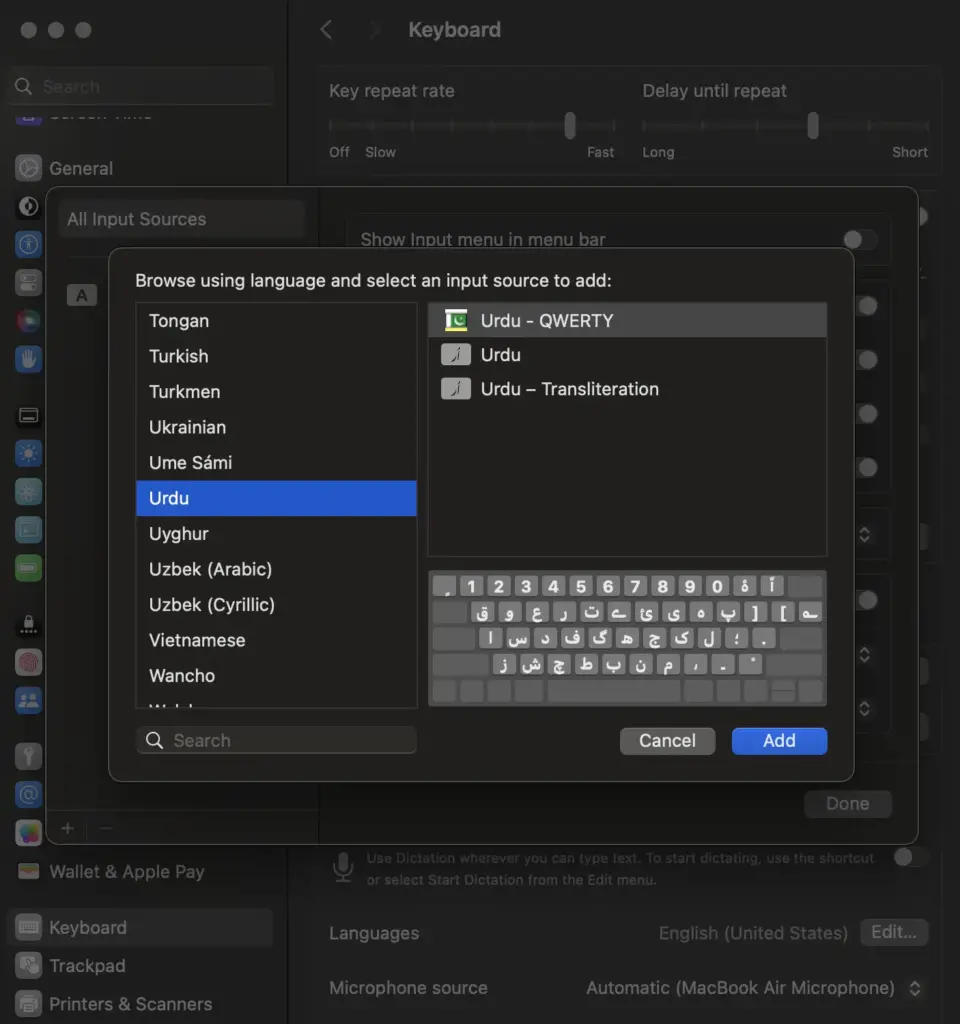
I would recommend using neither of these options. I prefer using Urdu — QWERTY which is mostly phonetic, enabling you to start typing in Urdu with some degree of fluency from the get-go. Unfortunately, macOS doesn't come with this keyboard, so you need to install it yourself. To do so, follow these steps:
- Download the keyboard Urdu - QWERTY (you can download it here)
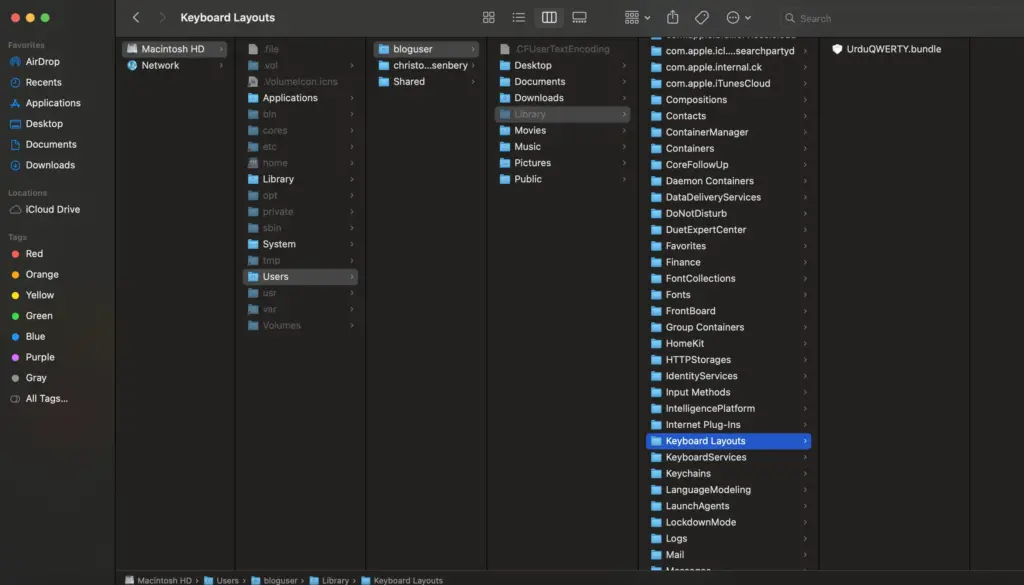
- Unzip the file. You'll need to use the file named "UrduQWERTY.bundle"
- Go to your user library (Go → Computer → Macintosh HD → Users → (your username) → Library
- It's possible that the Library folder will be hidden. To make it visible, type command+shift+. (hold down the command, shift and period keys at the same time and then let go).
- Once you're in the Library folder, go to "Keyboard Layouts" and drop the file "UrduQWERTY.bundle" into that folder.
- Go back to System Settings → Keyboard → Edit (Input Sources) and choose Urdu again. You should now see "Urdu - QWERTY" as an option.
#2 - Create a System for Easily Switching Keyboards
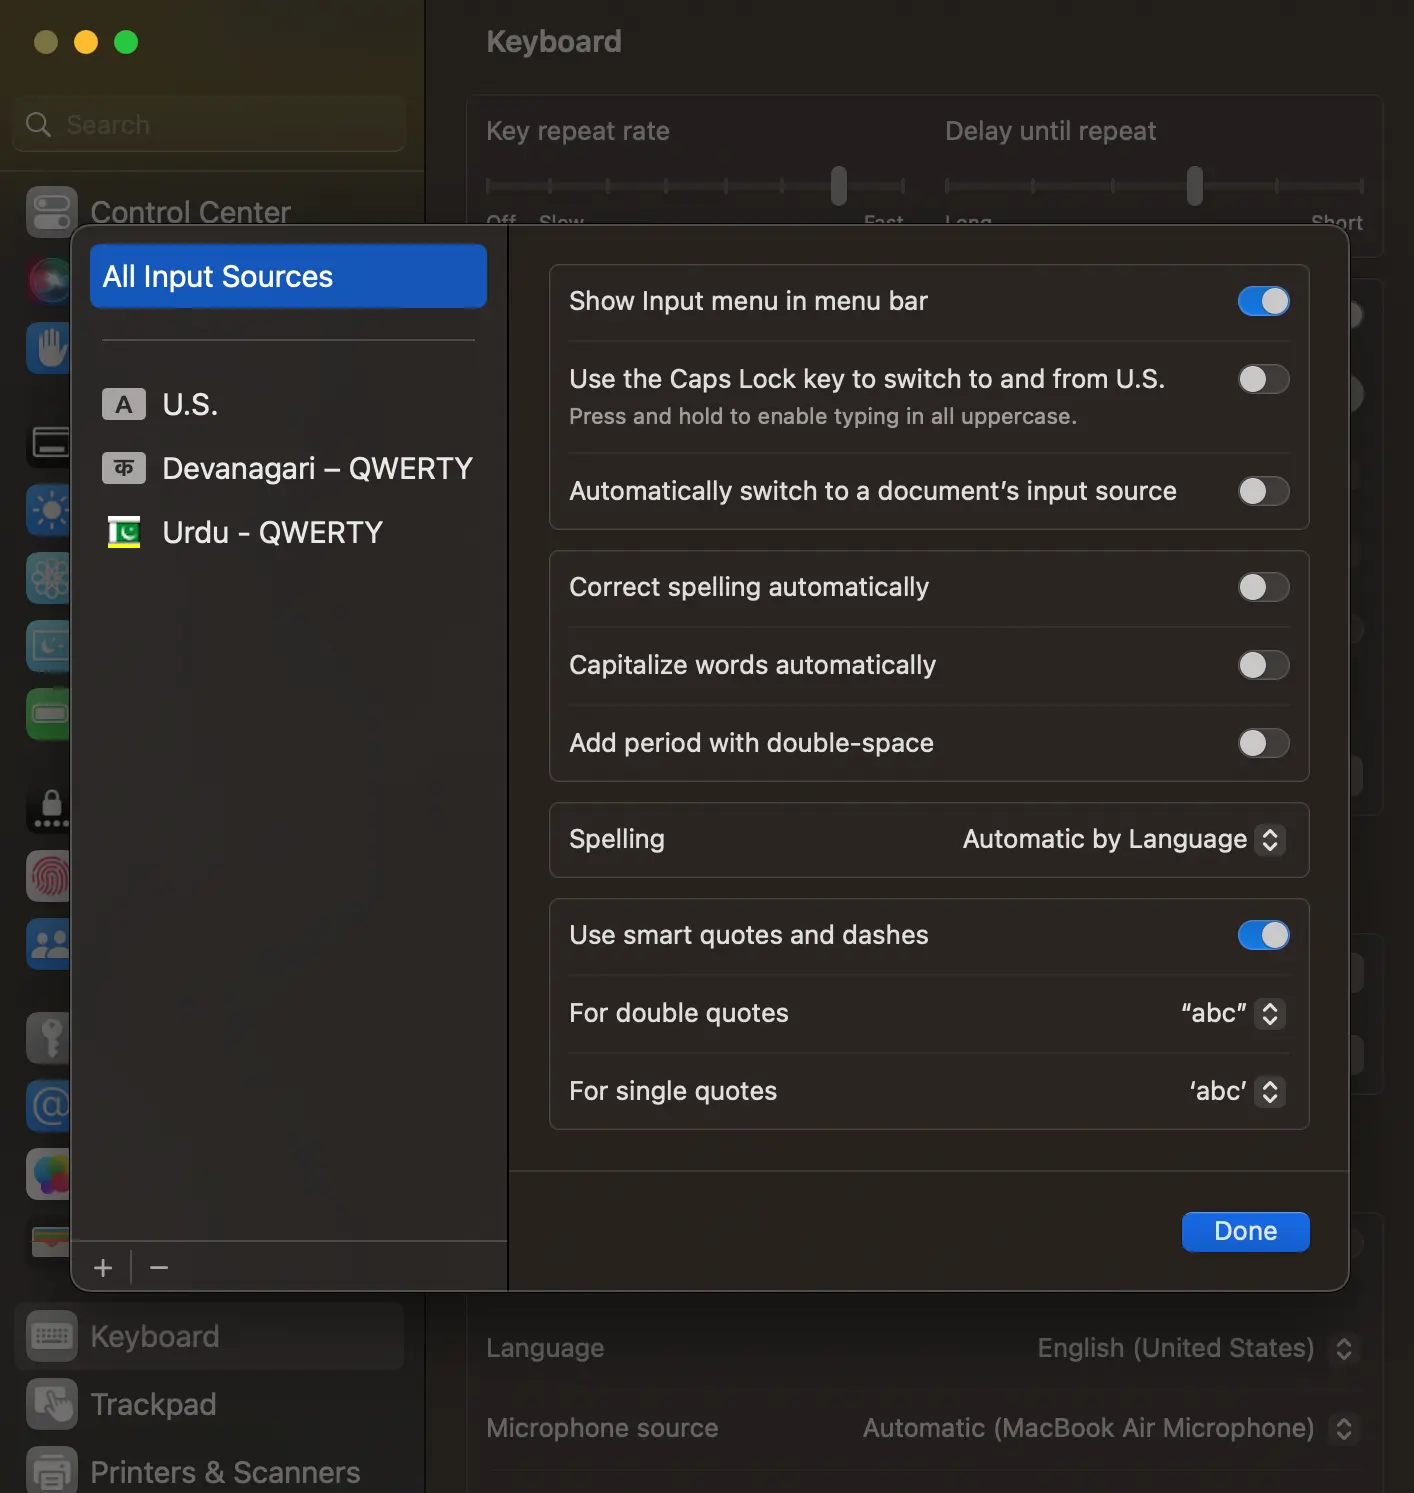
- Back in Input Sources (System Settings → Keyboard), make sure the box Show Input menu in menu bar is checked
- Now click Keyboard Shortcuts (found just above Text Input on System Settings → Keyboard)
- Select Input Sources from the list on the left
- Check the box next to Select the previous input source
- Select Spotlight from the list on the left
- Uncheck the box Show Spotlight search
Note: This will disable the shortcut for spotlight search. If this is a shortcut you use, you'll need to create a new shortcut.

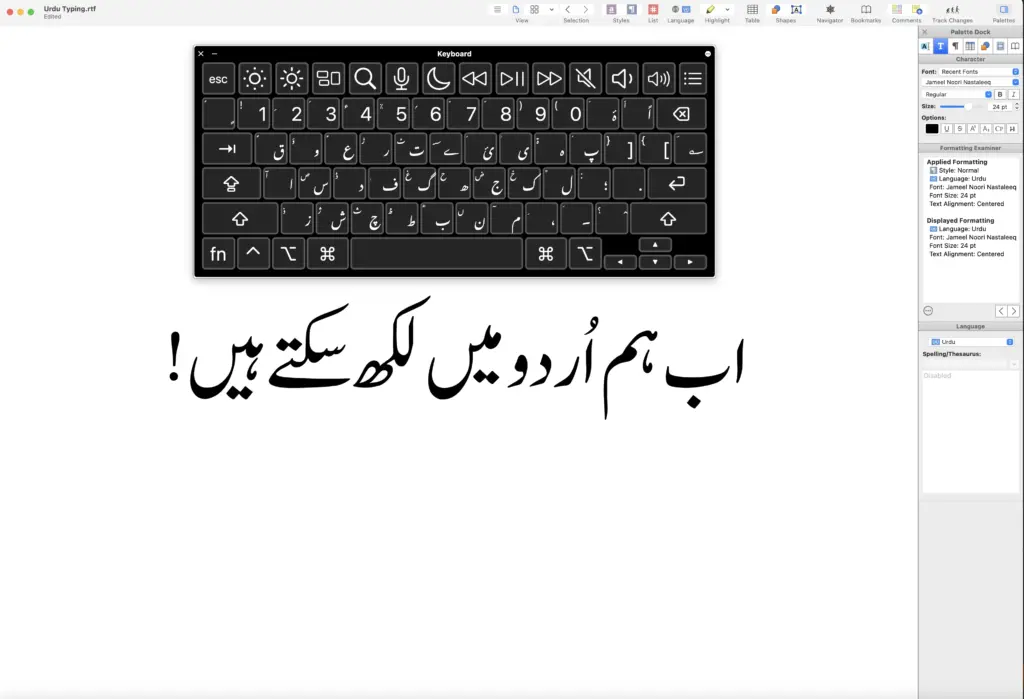
#3 - Use the Keyboard Viewer
The macOS in-built Keyboard Viewer is the best way to learn the Urdu keyboard you've installed. To see the Keyboard Viewer:
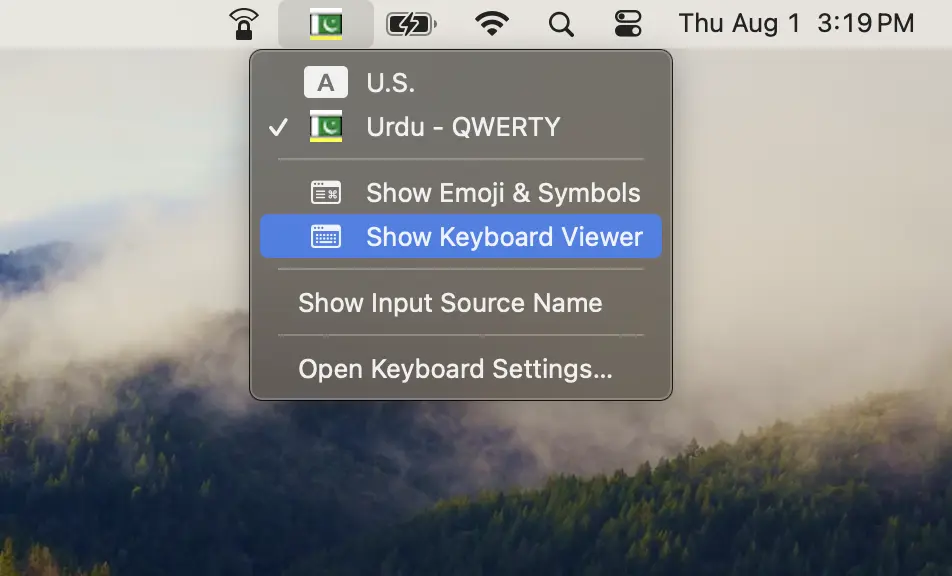
- Click on the language icon in the upper tray
- Click on Show Keyboard Viewer
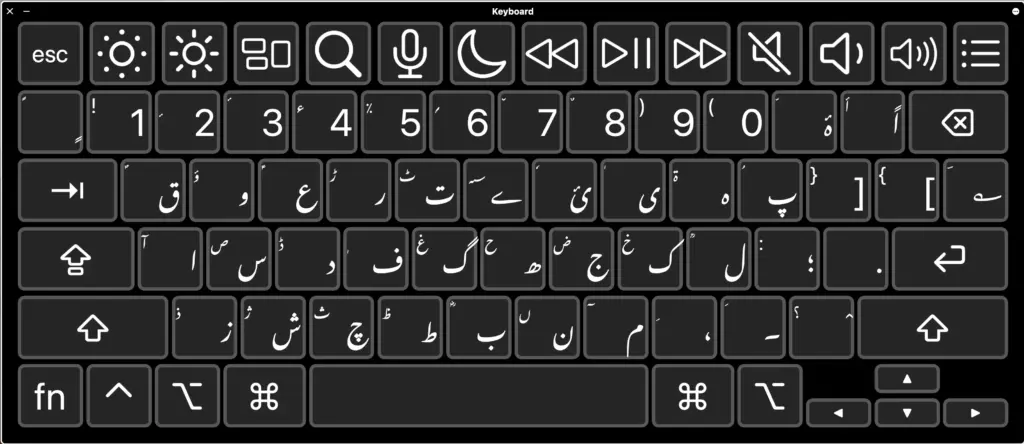
- You can resize the Keyboard Viewer by dragging its corners
- It'll show you all the possible keystrokes for whatever language you're currently using
Note: To see the full range of characters in the Urdu — QWERTY keyboard, use the shift and option keys alone and together.
#4 - Applications and Software
All built-in programs within your operating system (macOS) will support typing in Urdu. This means you can freely switch to Urdu while composing an email in Mail, make a Urdu note in Stickies, Notes, or Reminders, or type in Urdu within any input field while surfing the web.
You can also use the in-built TextEdit and Apple Pages to create documents in Urdu, and these programs will allow you to format your text however you'd like.
However, if you're looking for something more powerful, especially if you want to combine the Urdu and Hindi scripts in a single document, Nisus Writer Pro is my suggestion. It's a premium software solution for word processing and is especially capable when working with multiple languages. It allows me to smoothly write in English, Urdu, and Hindi within single documents, using a wide range of formatting.
To make the font Noto Nastaliq Urdu (which comes with your operating system) the default within Nisus Writer Pro, you can do the following:
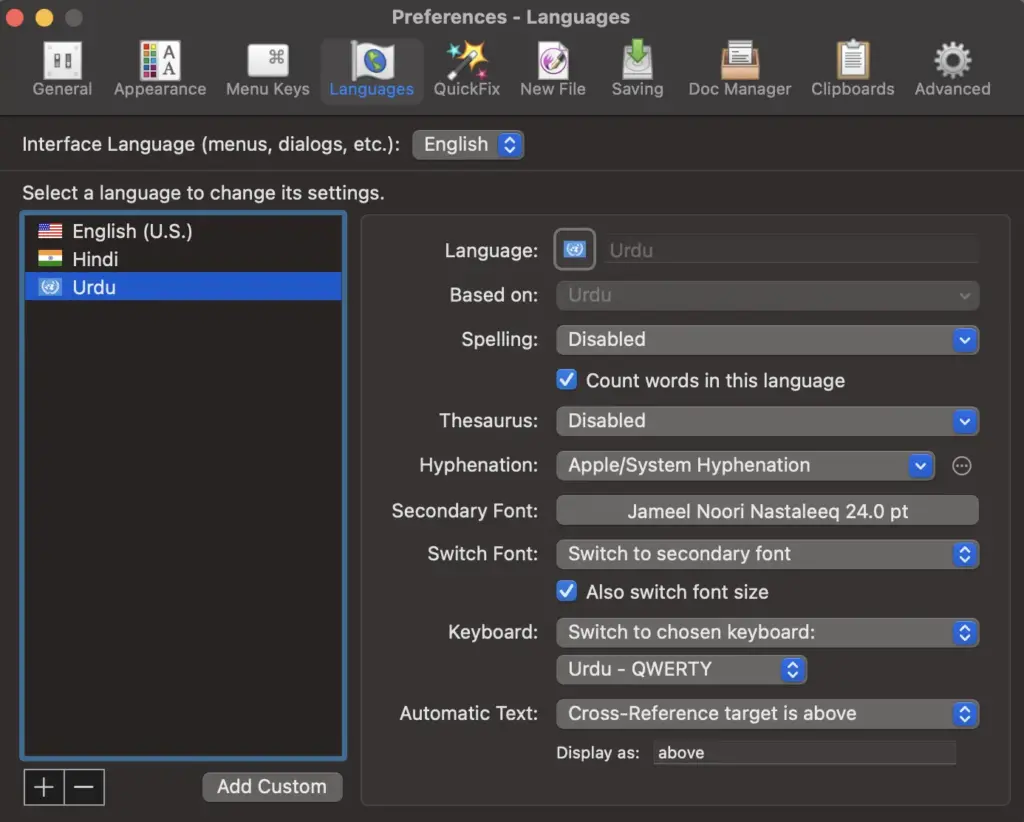
- Within Preferences, go to Languages
- Input your chosen Urdu font in Secondary Font (including the font size you prefer)
- Within Switch Font, choose "Switch to secondary font"
- Check the box "Also switch font size"
- For Keyboard, choose "Switch to chosen keyboard" and then select your preferred Hindi keyboard from the dropdown
Next, to take advantage of the Nisus Writer Pro settings above, we need to create a way to switch between English and Urdu within Nisus Writer Pro. While you can still switch between languages using the system-wide shortcut (command + space), the automatic font style and size won't work within Nisus Writer Pro when you switch languages that way. Instead, we need to install what's called a Macro. You can go ahead and download the macro you need here if you like. Once you've downloaded the Macro, follow these steps:
- Unzip the file
- In Nisus Writer Pro, go to the Macro drop-down menu and then choose "Add Macro to Menu from File"
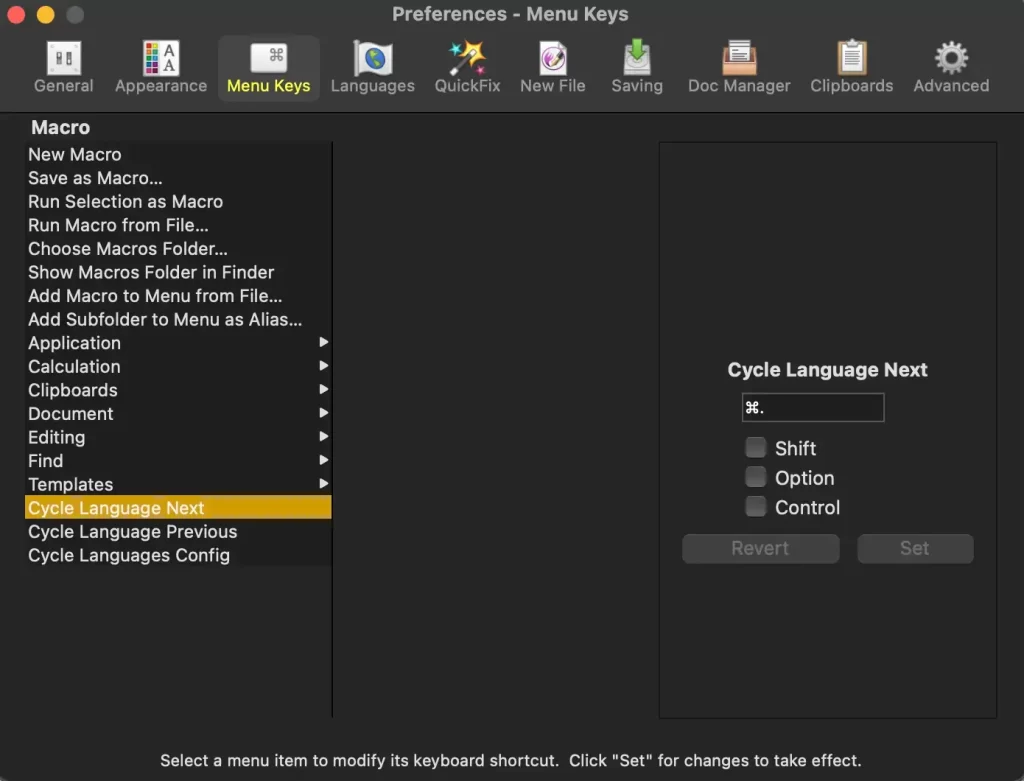
- Once installed, go to Preferences and then Menu Keys
- Assign shortcuts for Cycle Language Next and for Cycle Language Previous (I like to use (command + .) (command and period) and (command + ,) (command and comma)
#5 - Putting It All Together
Assuming you've enabled the Urdu - QWERTY keyboard, you'll find it's relatively intuitive, but there are a few quirks to learn.
Typing most consonants is straightforward. To type گ, you type "g." If you want an aspirated گھ, type "g" and then "h."
The ی (choṭī ye) is produced by typing "i" while the ے (baṛī ye) is produced by typing "y."
One difficulty I faced when first learning was figuring out how to produce a "hamza" over a vowel such as the ی (choṭī ye). I finally figured out that you have to type "u." To produce the word نئی (naī) for example, type the following:
- n
- u
- i
As you're getting the hang of it, I'd recommend enabling Show Keyboard Viewer. Now you're on your way!
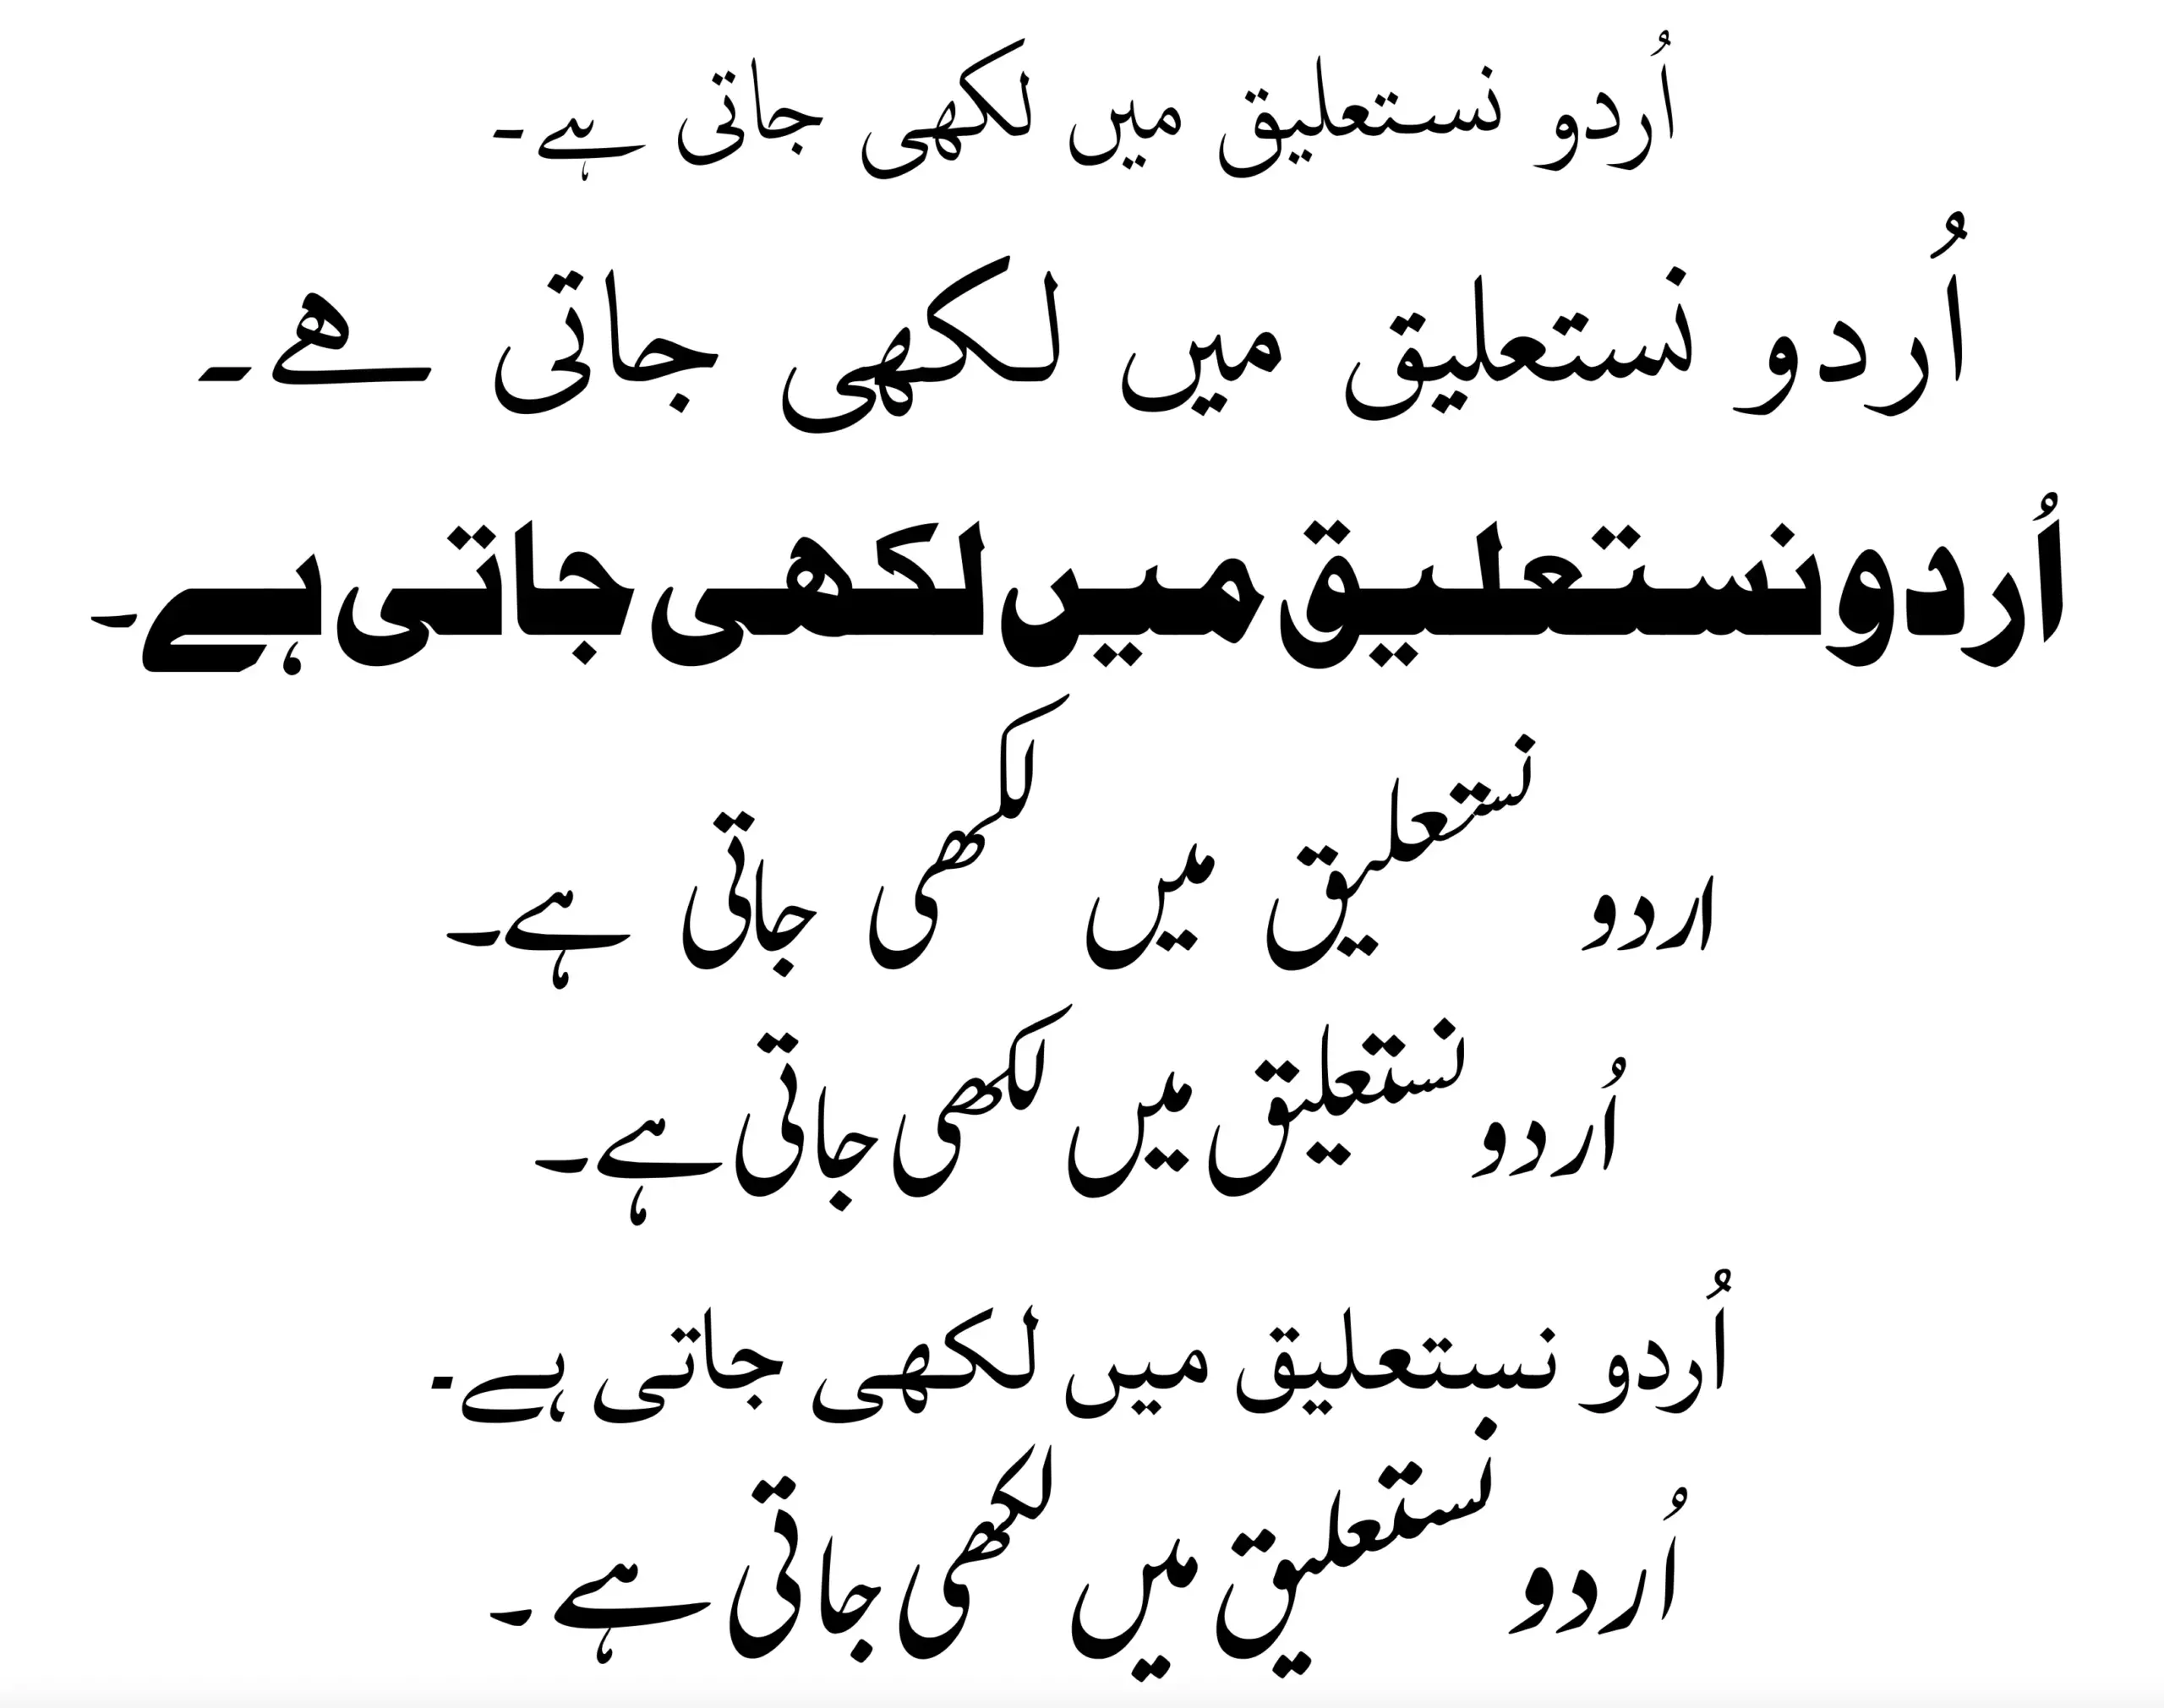
Urdu Fonts
Want to try Urdu fonts other than the system defaults? Head over to my Urdu Fonts page and explore a wide range of fonts available for free download.

Comments 2
Best tutorial on the subject i’ve found so far! Everything worked exactly as described. Thank you so much. I was afraid of typing in Urdu and have been using ChatGPT to convert instead, until now.
Author
I’m so glad to hear that!
Let me know if you run into any difficulties.