Overview
Note: This post was written using Linux - Ubuntu (22.04.2).
In my last published post (How to Type in Hindi in Linux - Ubuntu), I was surprised by how user-friendly this Linux OS is. Now, having spent more time with it to write this post, I've become even more impressed and am happy to report that the in-built options provide a relatively easy and powerful solution for typing in Urdu!
Typing in Roman Transliteration
#1 - Add Urdu in Settings
- Click on the Show Applications button and select the gear icon to open Settings.
- Select Keyboard (near the middle of the list on the left-hand side).
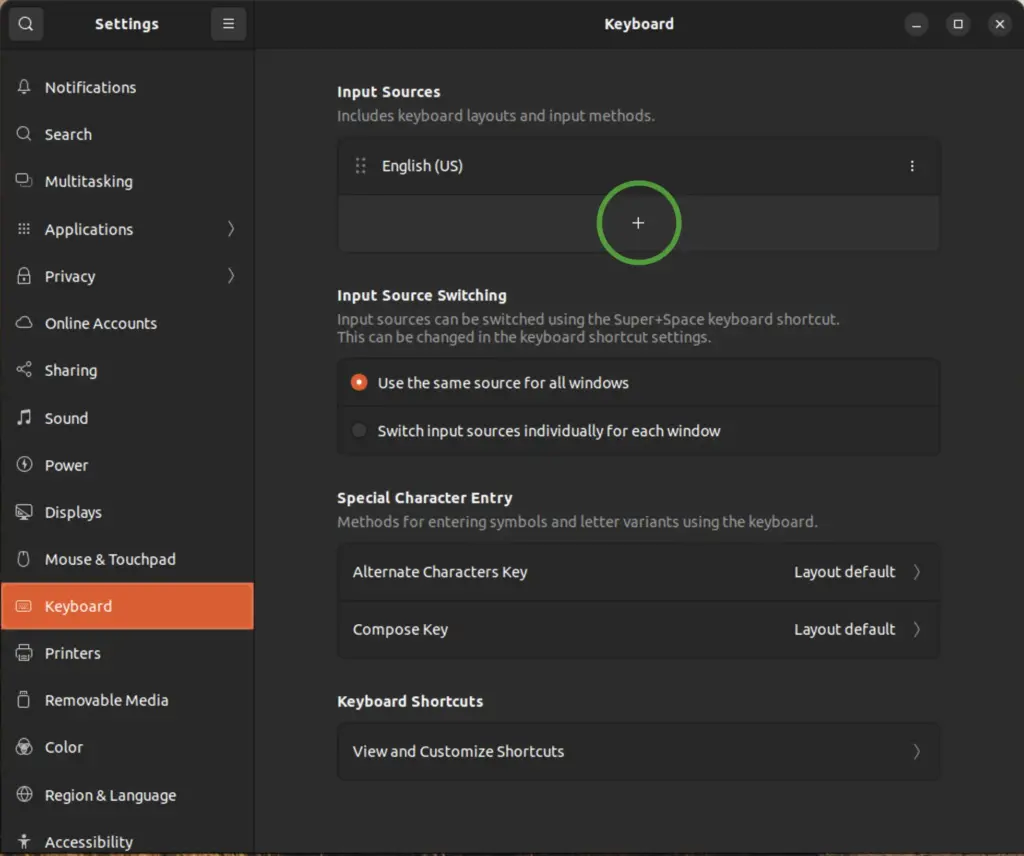
- Under Input Sources, click on the + symbol.
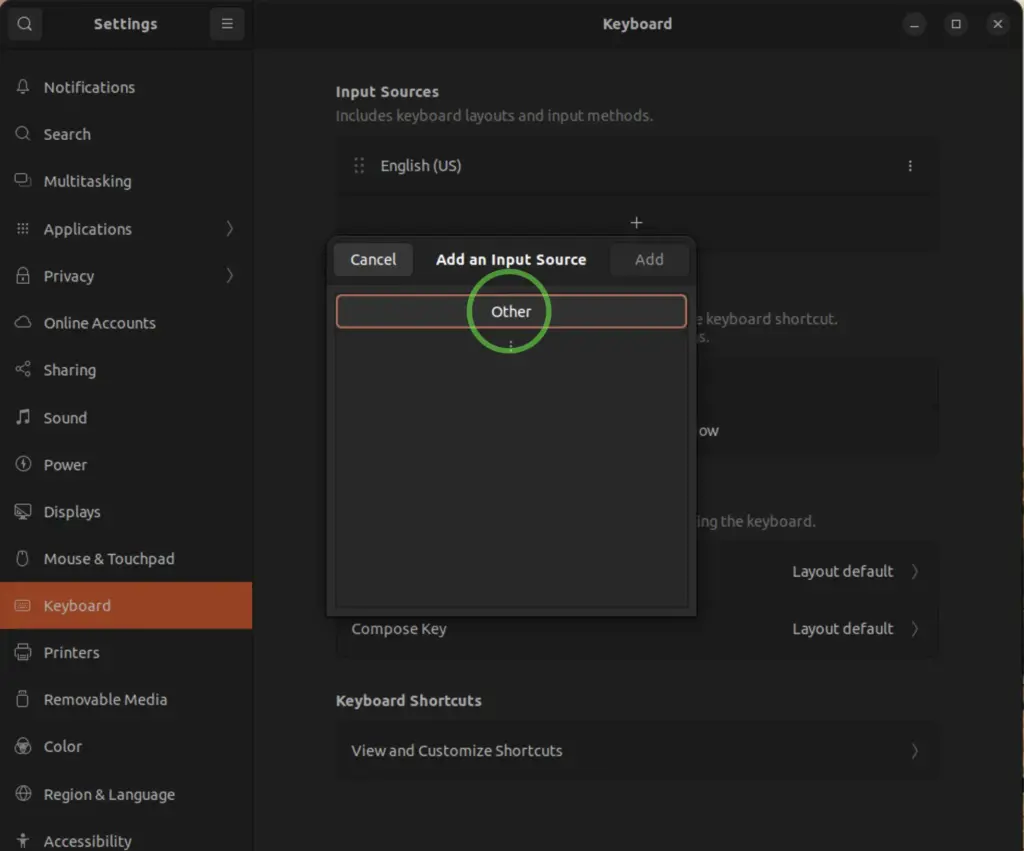
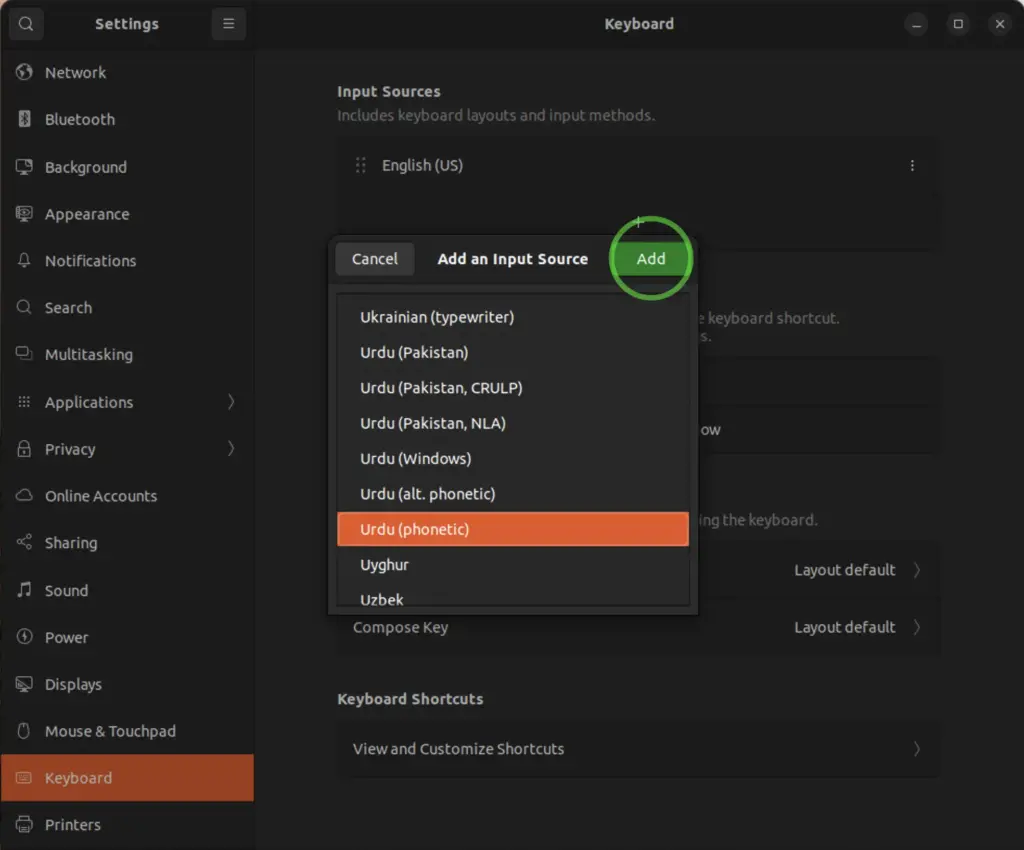
- Click on Other and then the system should generate a long list of languages and their various keyboards.
- Scroll down to find the Urdu keyboards (it's alphabetical). Highlight one of the six options, such as Urdu (phonetic) and then click Add.
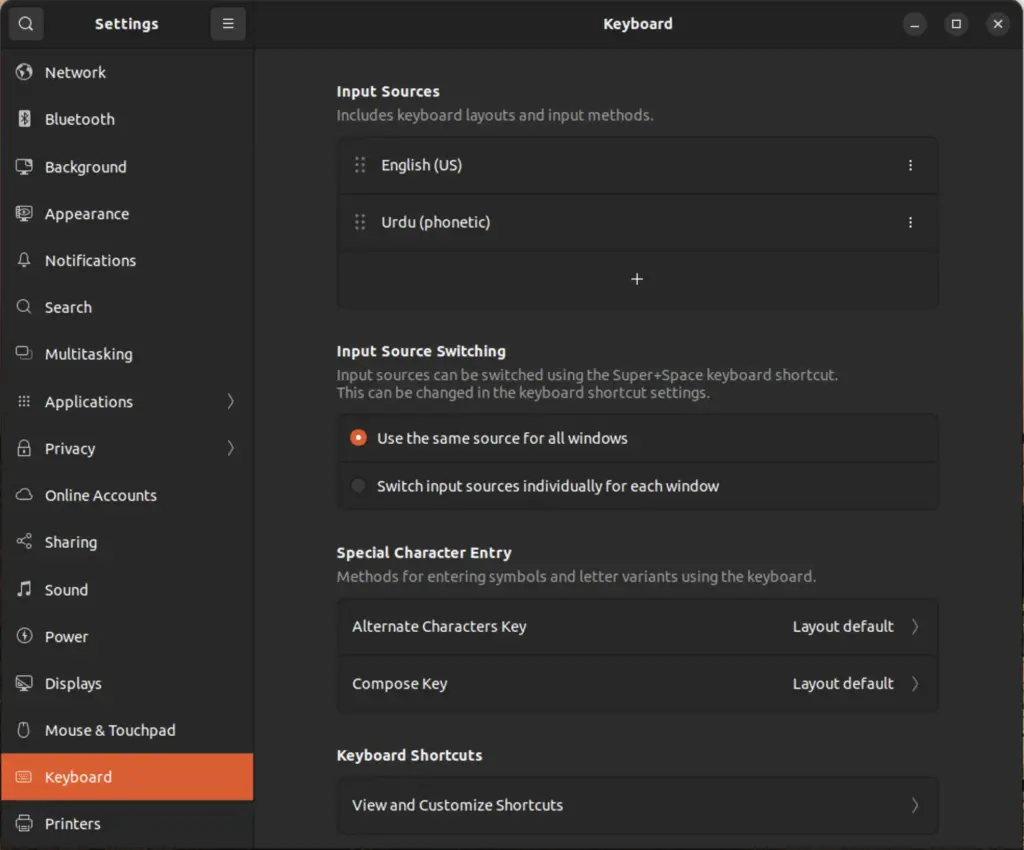
- You should see that Urdu (phonetic) is added to your list of Input Sources.
#2 - Switching Languages
After adding Urdu in Settings, you'll have a few different ways of switching between languages.
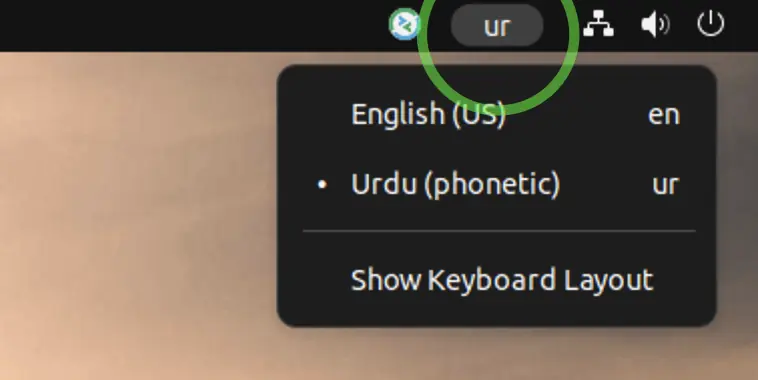
Using the System Tray
Look for the language button on the right side of your system tray (usually at the top right-hand corner of your screen). It should display the current input language, such as en for English and ur for Urdu. Click on it and select Urdu (phonetic) from the menu.
Using a Keyboard Shortcut
You can also switch languages quickly using the keyboard shortcut Super Key + Space. This will allow you to quickly cycle through the installed keyboards.
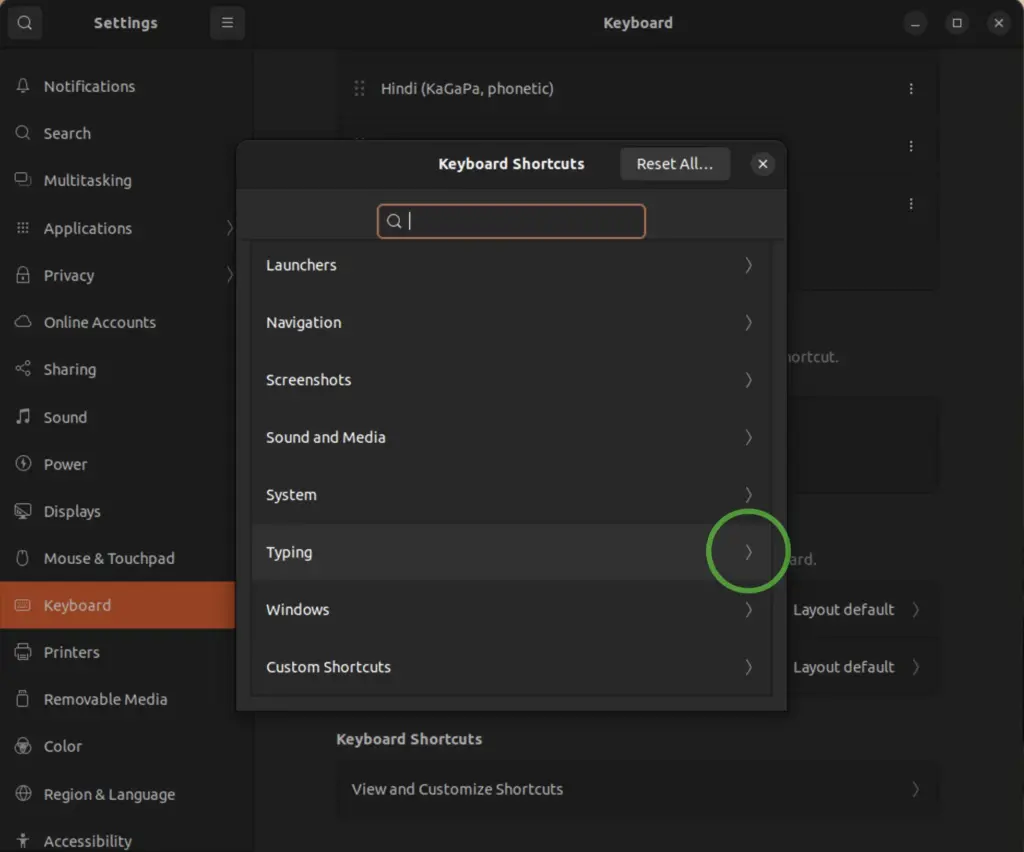
If you want to change that shortcut, you can find it and modify by doing the following:
- Go to Settings.
- Select Keyboard.
- At the bottom, there's a section called Keyboard Shortcuts. In that section, click on View and Customize Shortcuts.
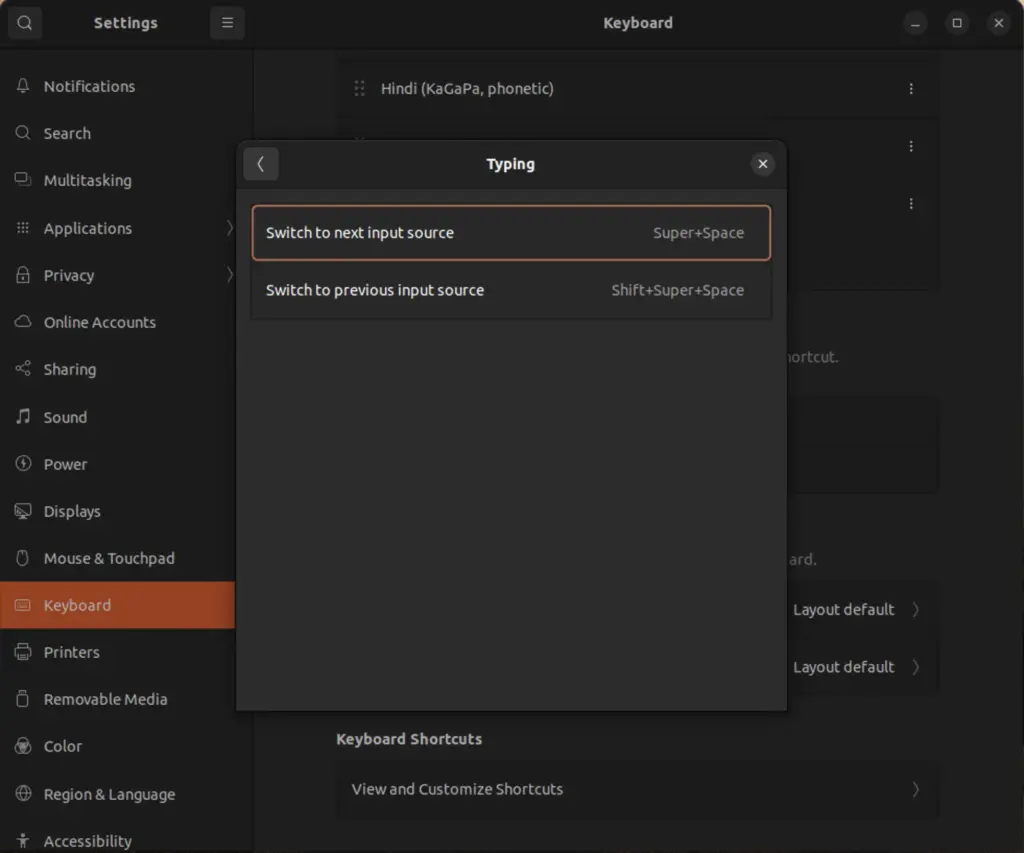
- From the list of Keyboard Shortcuts, select Typing.
- Click on Switch to next input source and then enter whatever keyboard shortcut you prefer. If you wish, you can also change the shortcut for Switch to previous input source, which is especially helpful if you have three or more keyboards installed.
#3 - Urdu Keyboard Layouts
In the above instructions we added the keyboard Urdu (phonetic), but that's not the only option. In the build of Ubuntu I'm currently using (22.04.02), there are a total of six in-built Urdu keyboards:
- Urdu (Pakistan)
- Urdu (Pakistan, CRULP)
- Urdu (Pakistan, NLA) (not phonetic)
- Urdu (Windows) (not phonetic)
- Urdu (alt. phonetic)
- Urdu (phonetic)
Two of these options are not phonetic (marked above). The other four are phonetic and quite similar to the Urdu - QWERTY keyboard I use on Mac OS (which is my personal favorite). They use use the shift key and the "super key" (i.e. the Windows key in Windows or the "option" key on a Mac) to cover all of the Nastaliq characters.
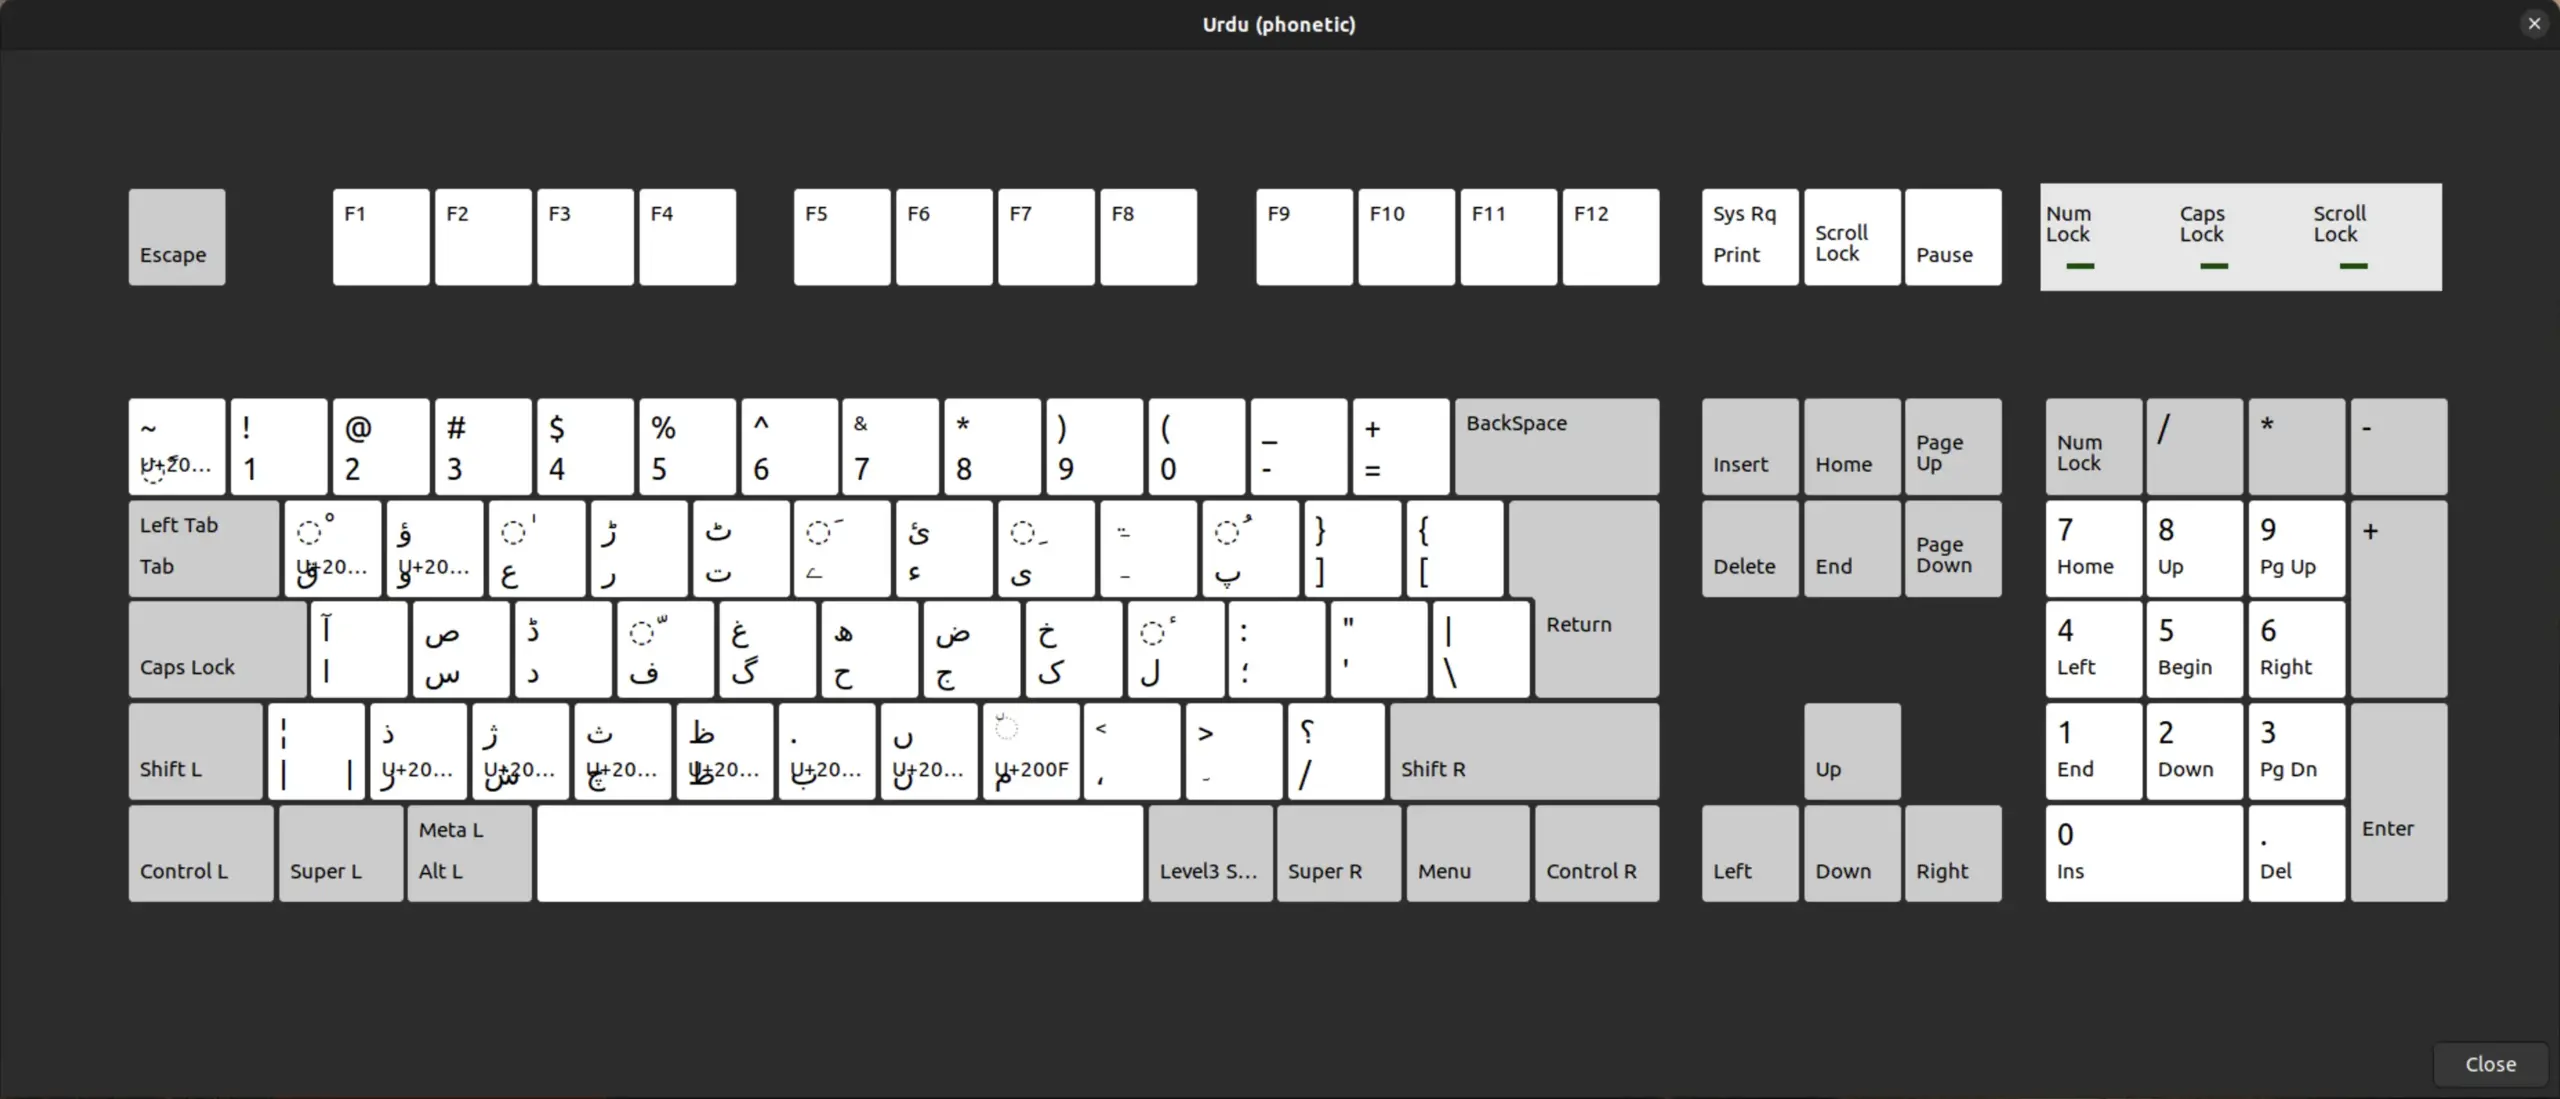
I personally prefer the phonetic options because you can start typing relatively fast from the beginning whereas the non-phonetic options require you to learn the layout. The phonetic keyboards are very similar and only have minor differences (e.g. in how to type ہ choṭī he). Here's a list of some of the keys which might not be so intuitive when using the Urdu (phonetic) option:
- Type o for ہ (choṭī he).
- Type i for ی (choṭī ye).
- Type y for ے (baṛī ye).
- Type shift+n for ں (nūn-gunna)
- Type shift+y for ◌َ (zabar)
- Type shift+i for ◌ِ (zer)
- Type u for ء (hamza)
- Type shift+u for ئ (connecting hamza)
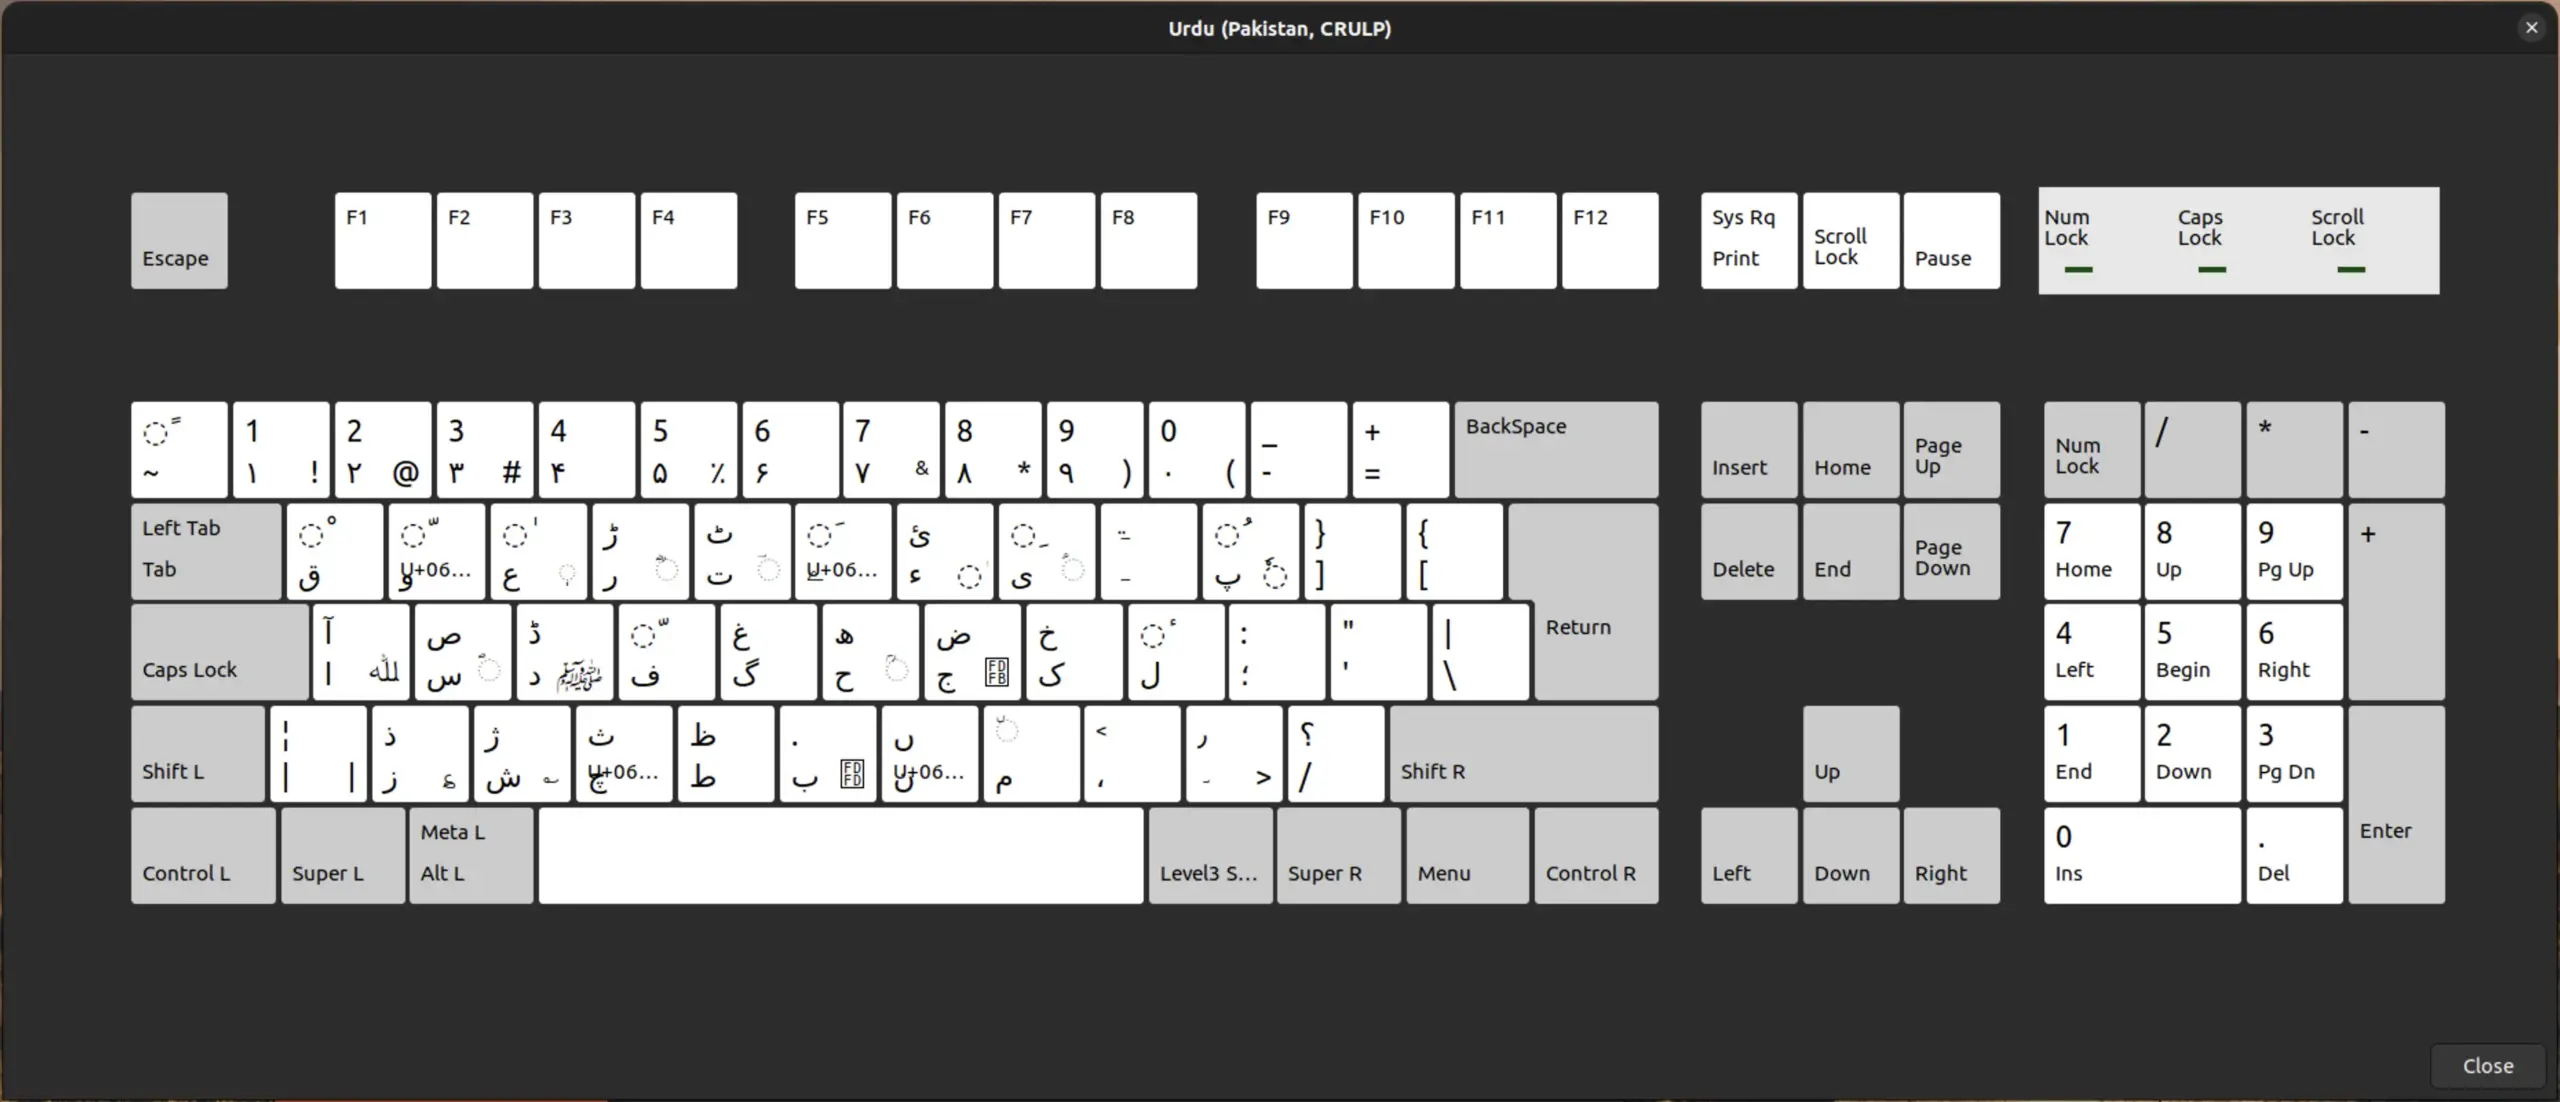
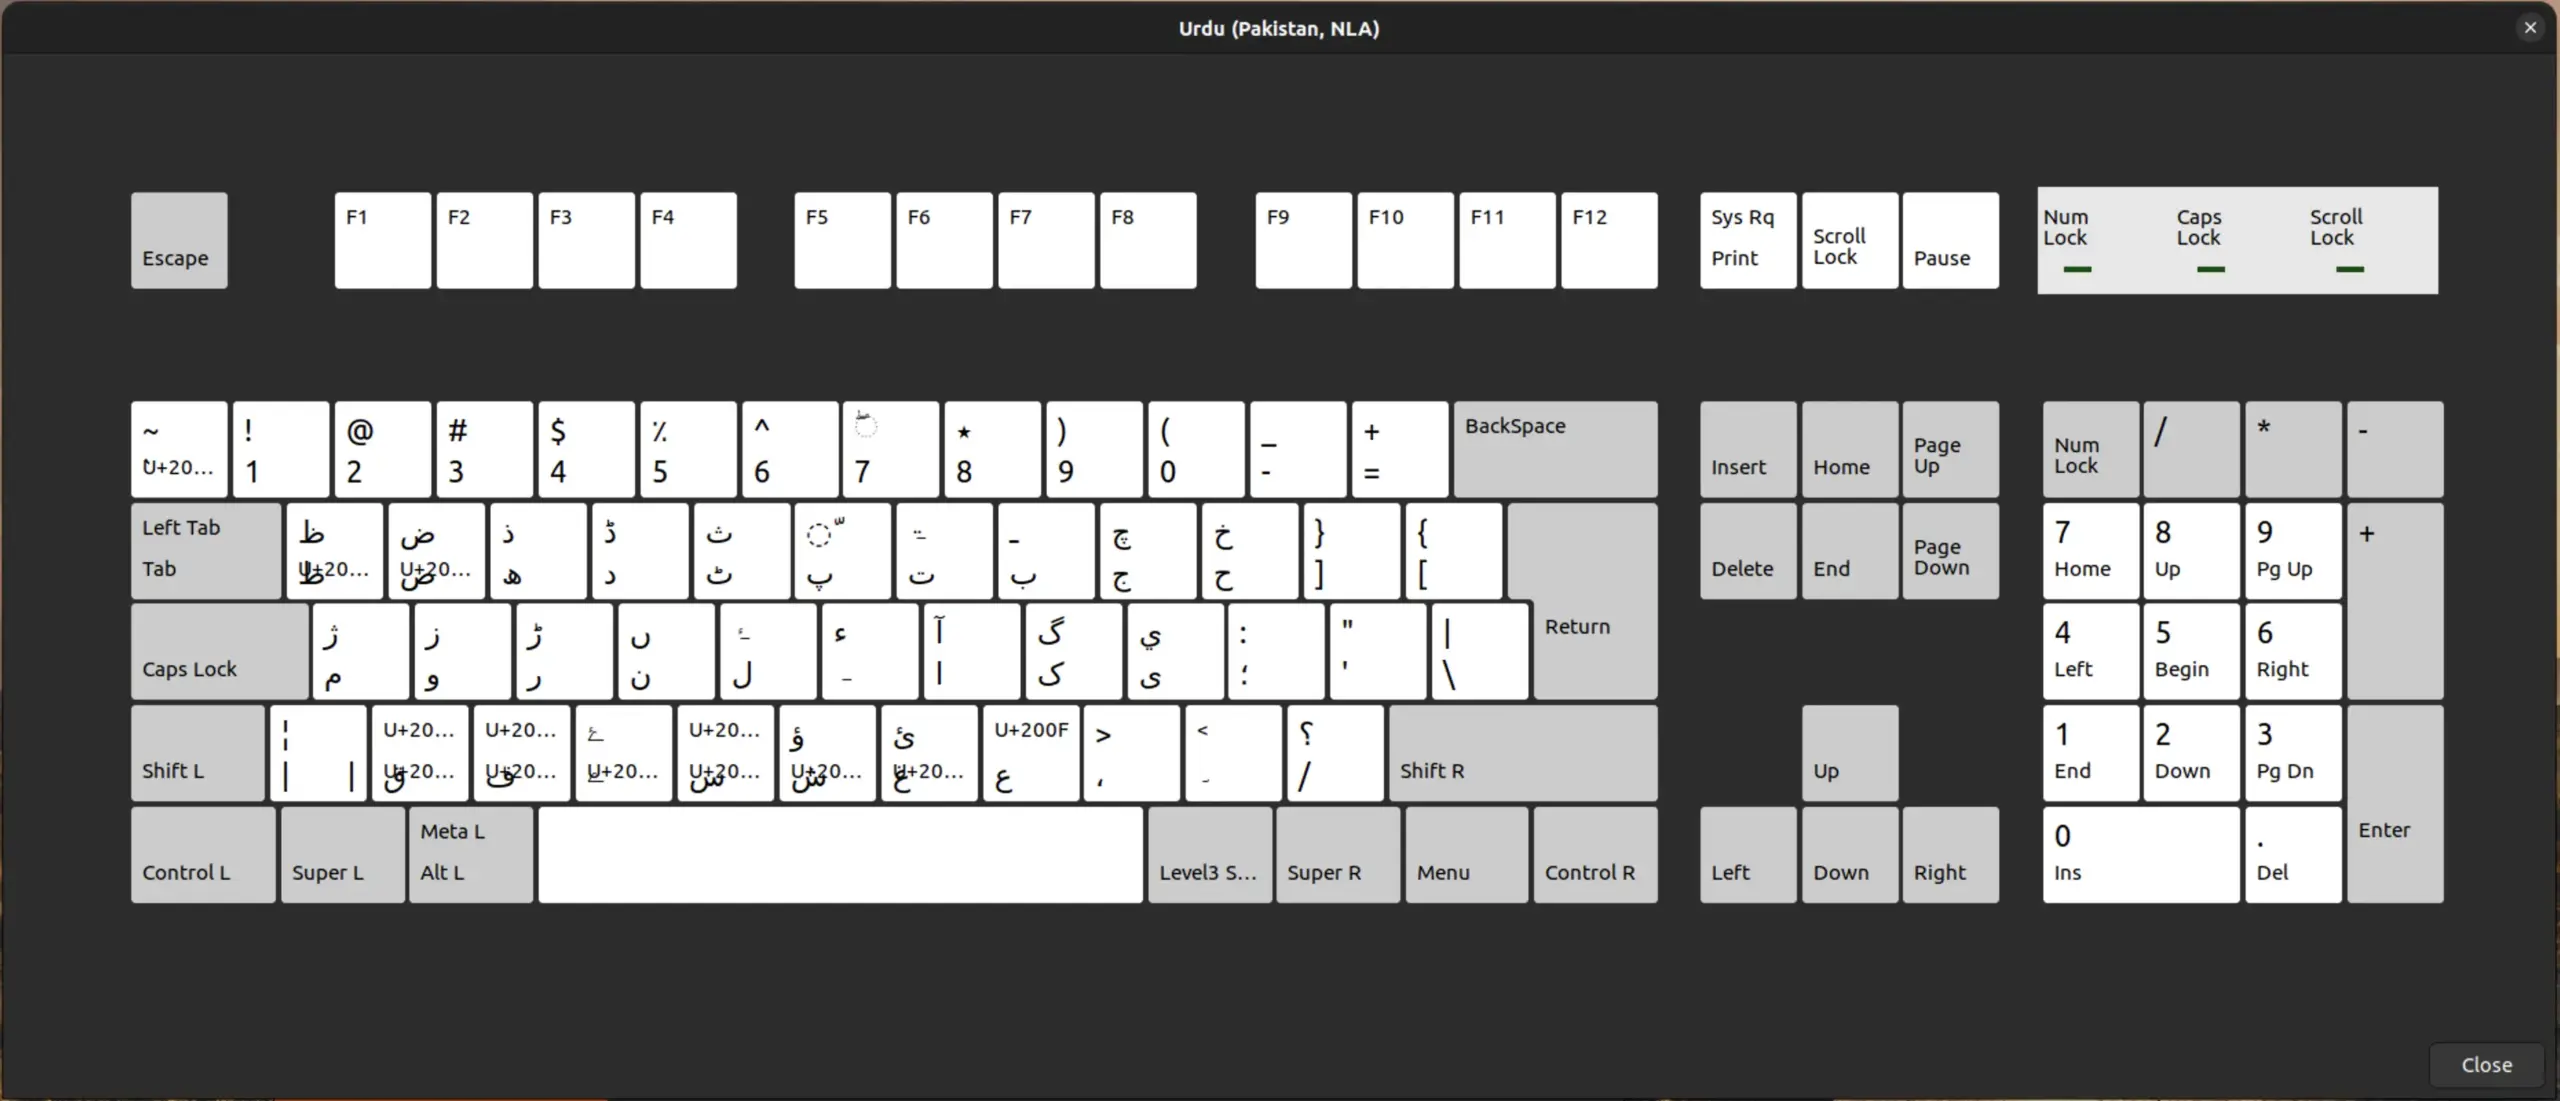
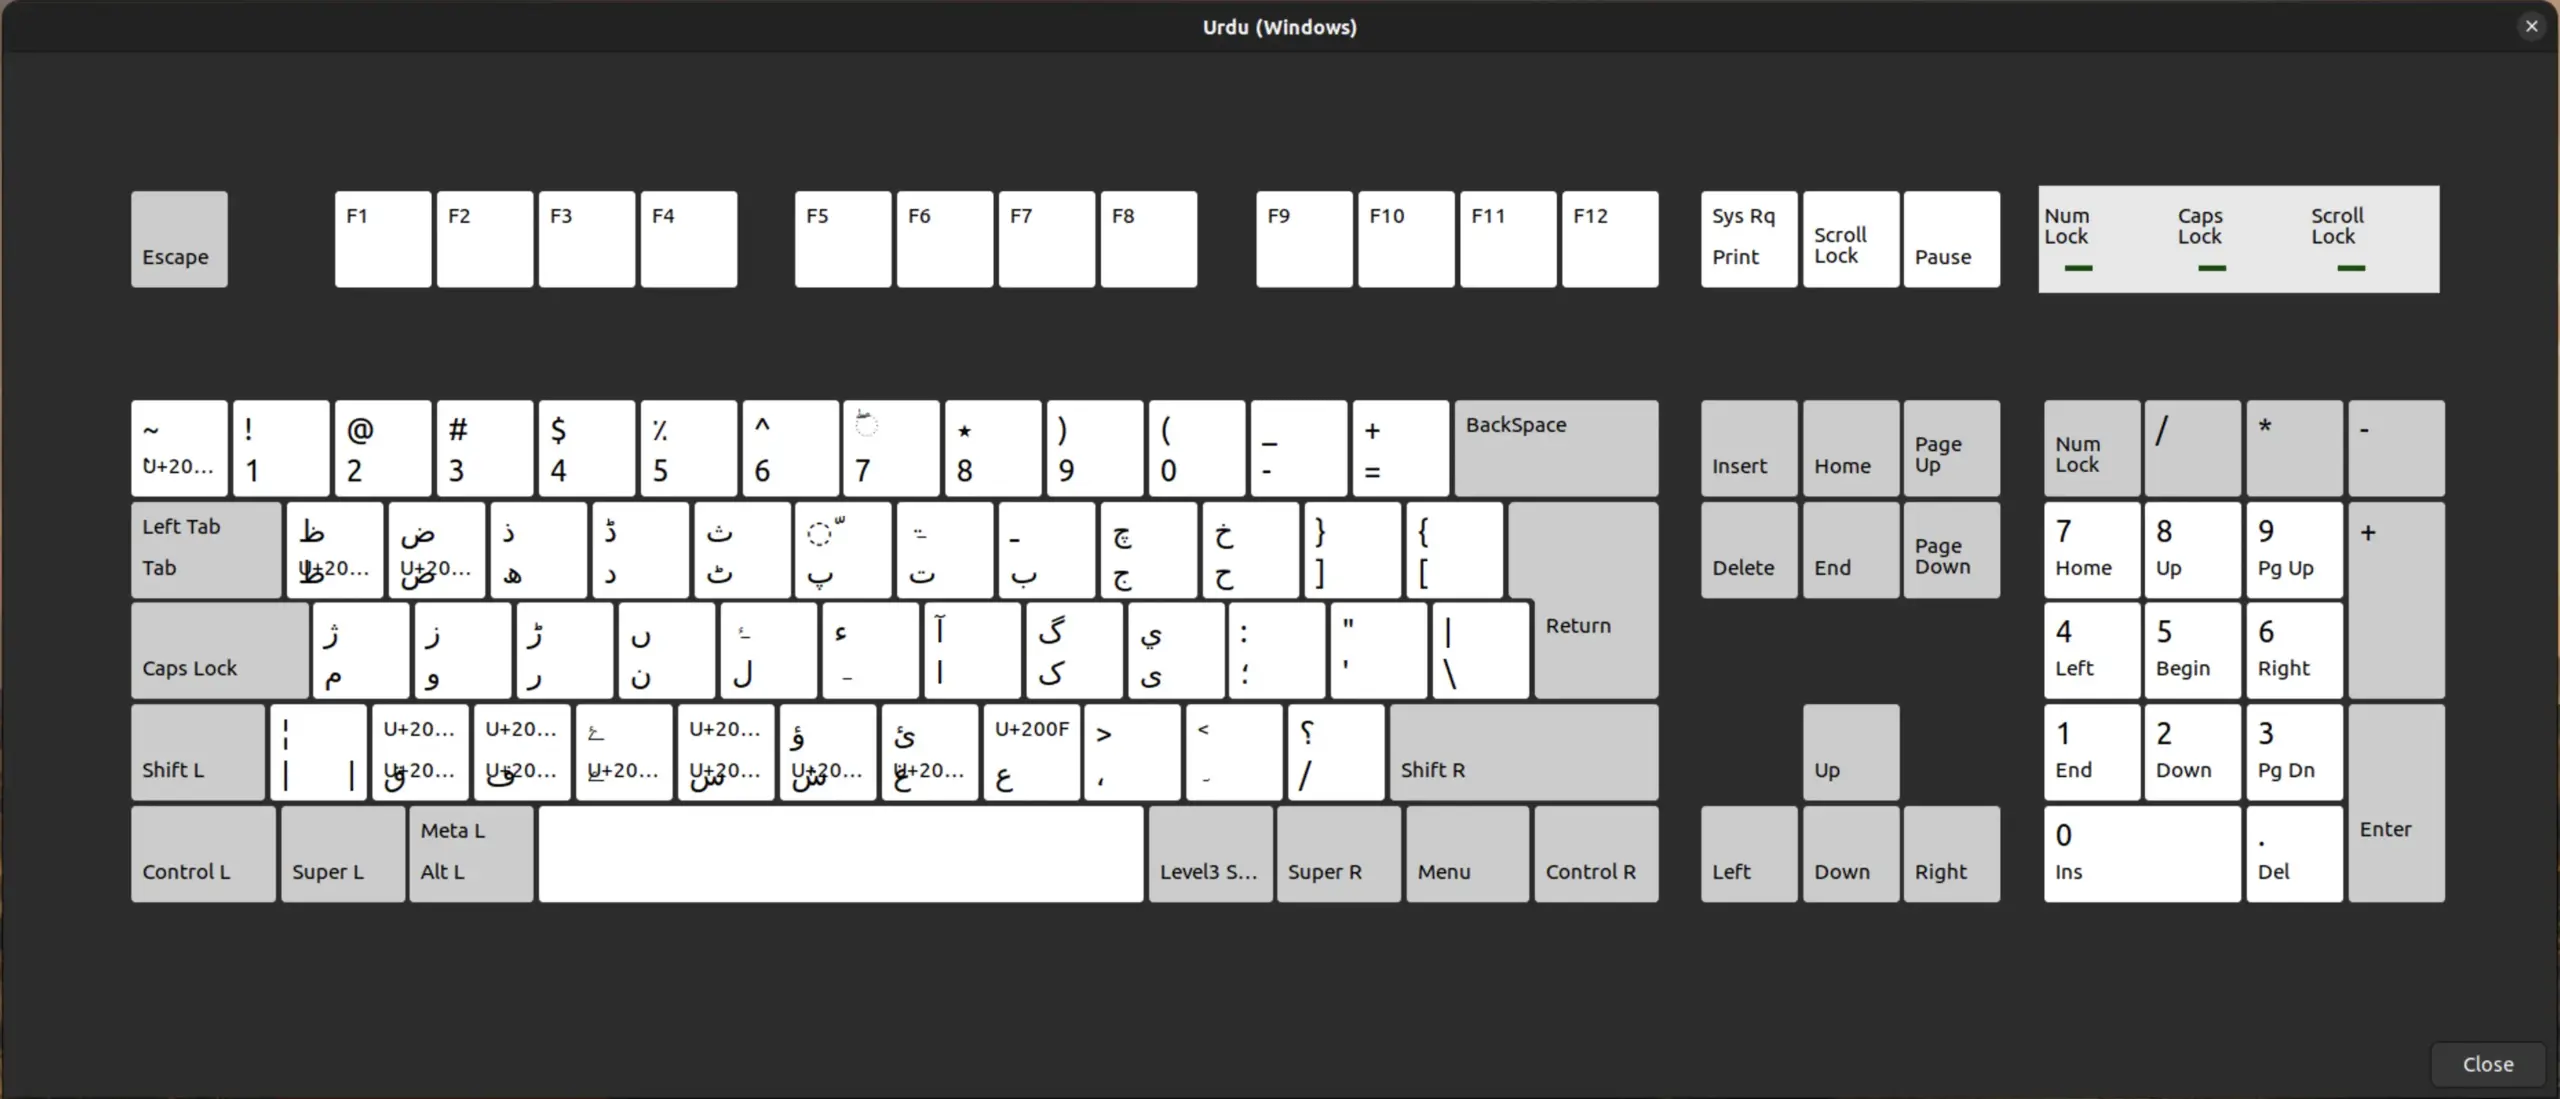
Here are images of the keyboard layouts of all six options.
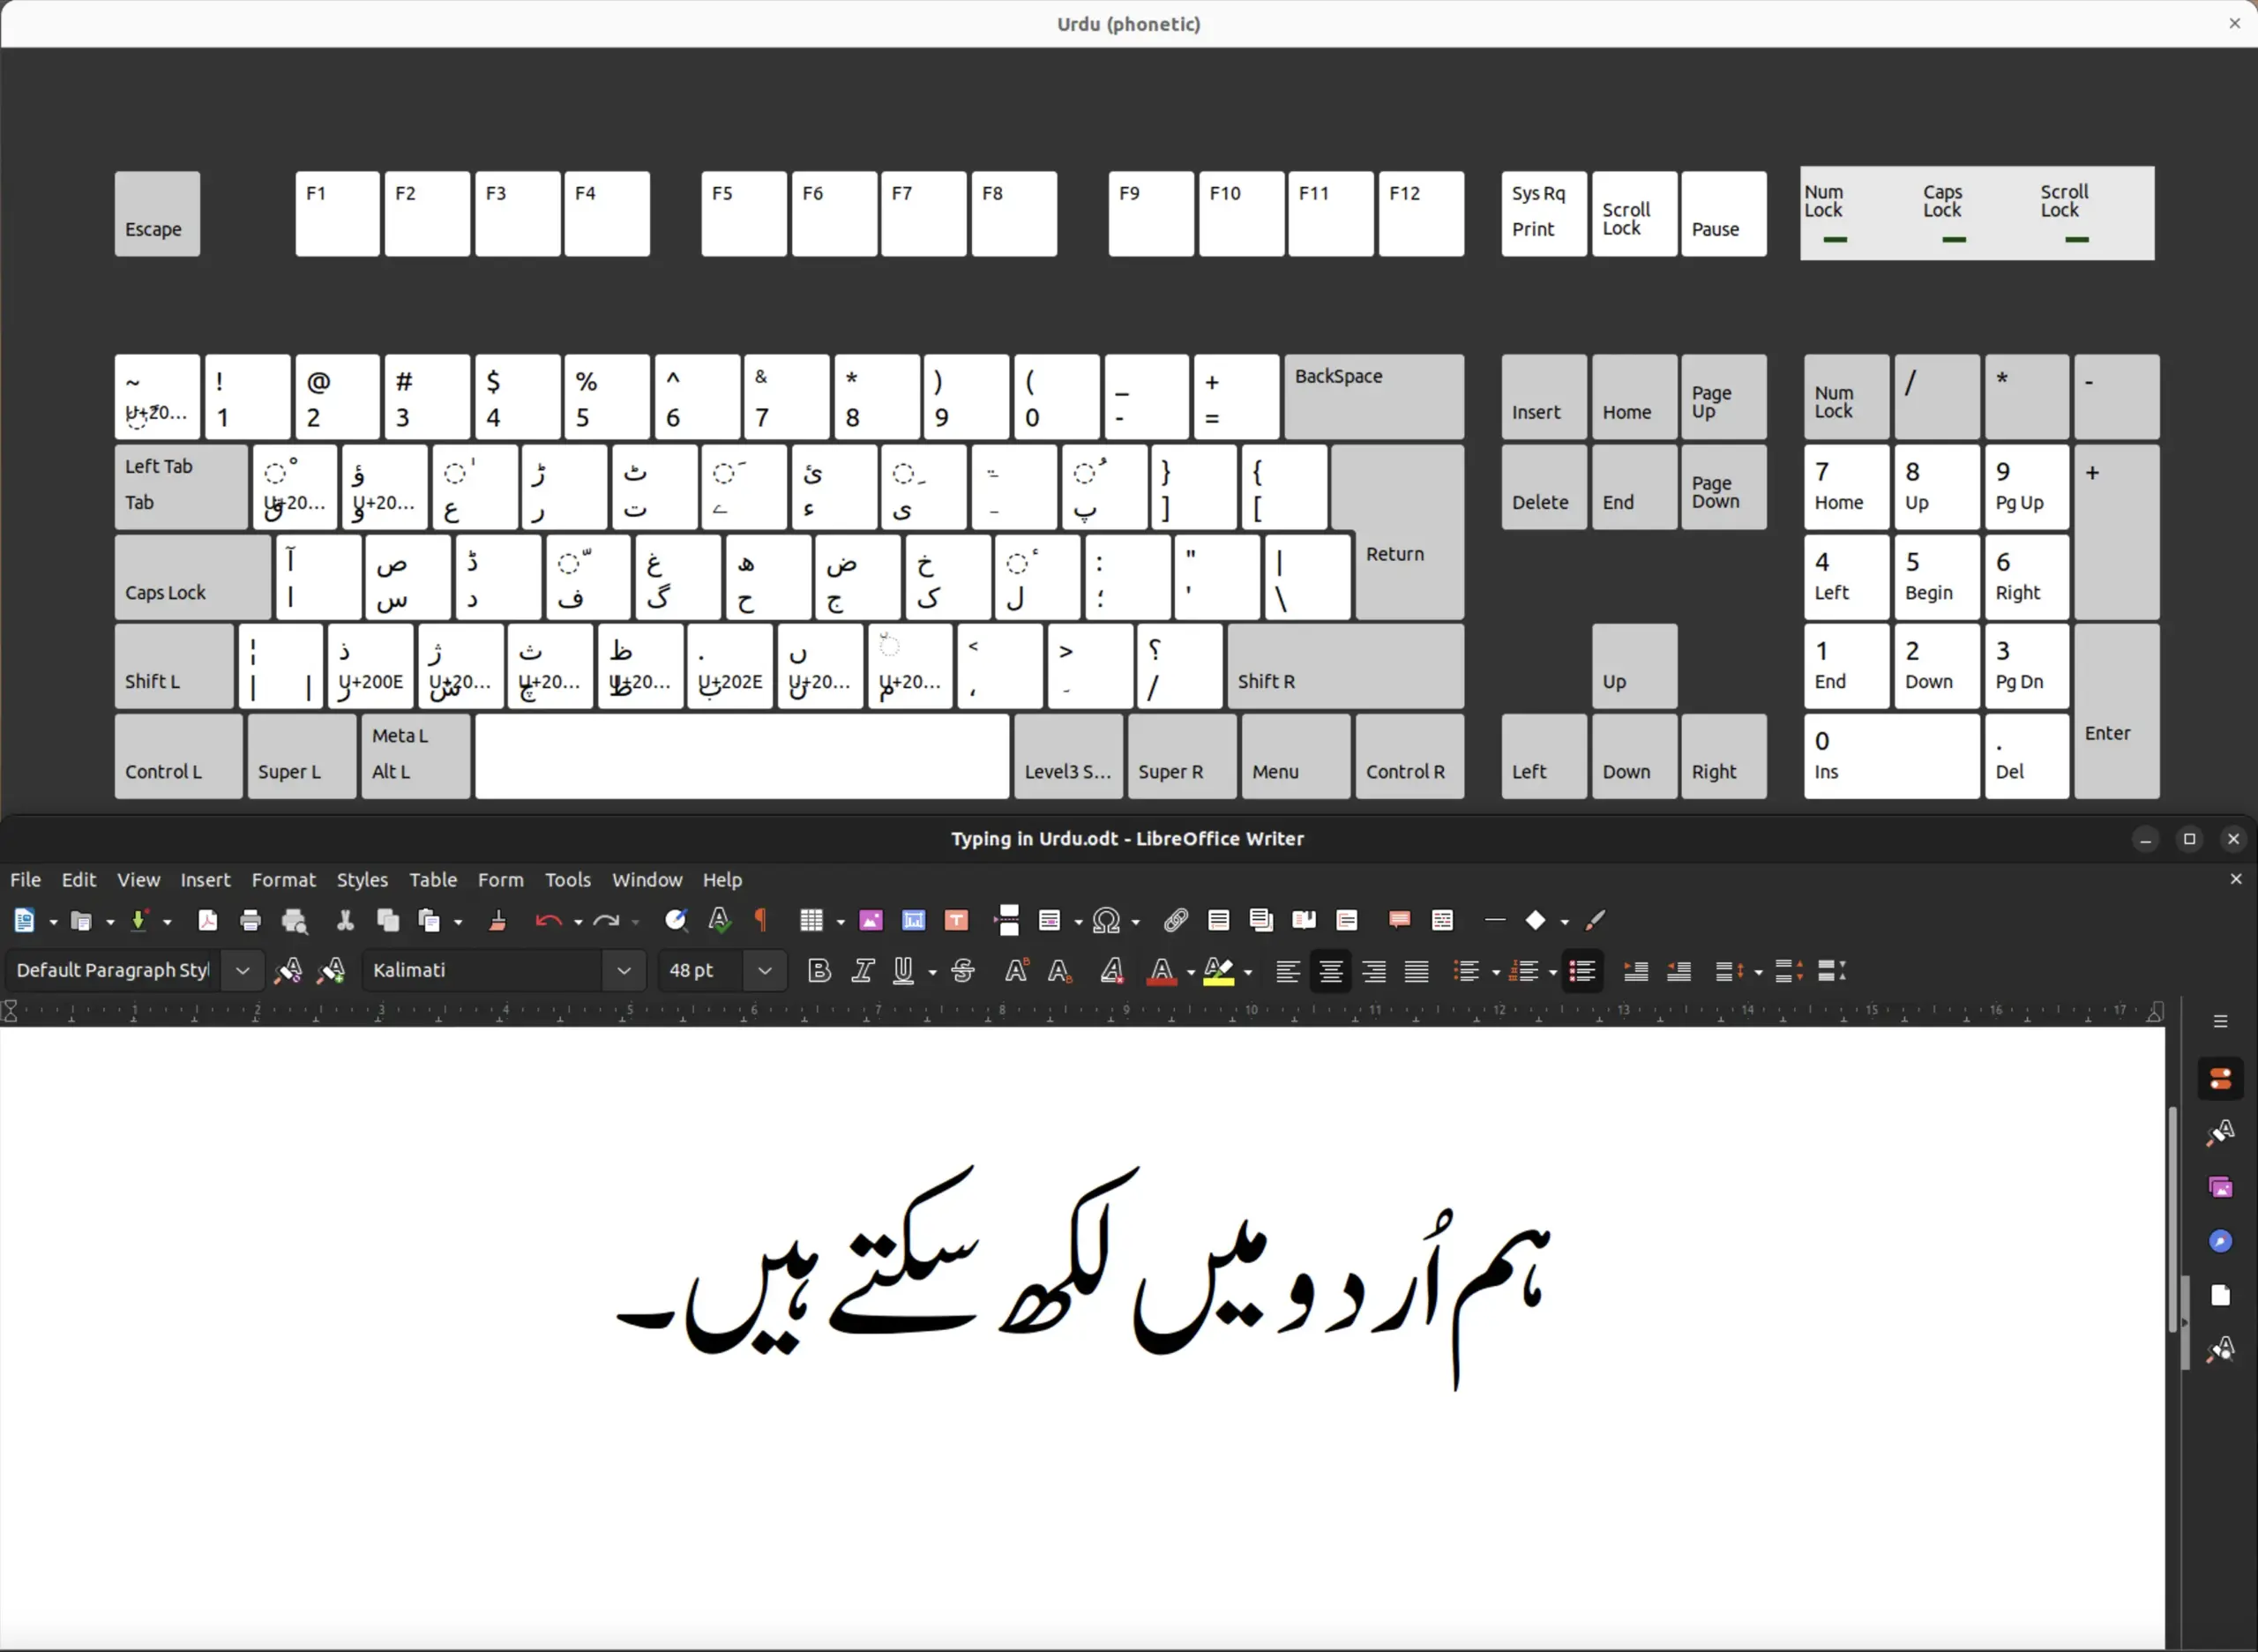
Urdu (phonetic)
Urdu (Pakistan)

Urdu (Pakistan, CRULP)
Urdu (Pakistan, NLA)
Urdu (Windows)
#4 - Typing in Urdu
Once you’ve switched to one of the Urdu keyboards, you can start typing in Nastaliq. When you're first starting, you should refer to the Keyboard Layout image for whichever keyboard you're using. To access that image, do the following:
- Go back to Settings → Keyboard.
- Click on the drop-down menu next to the keyboard you're using.
- Select View Keyboard Layout.
- The image of the layout should appear.
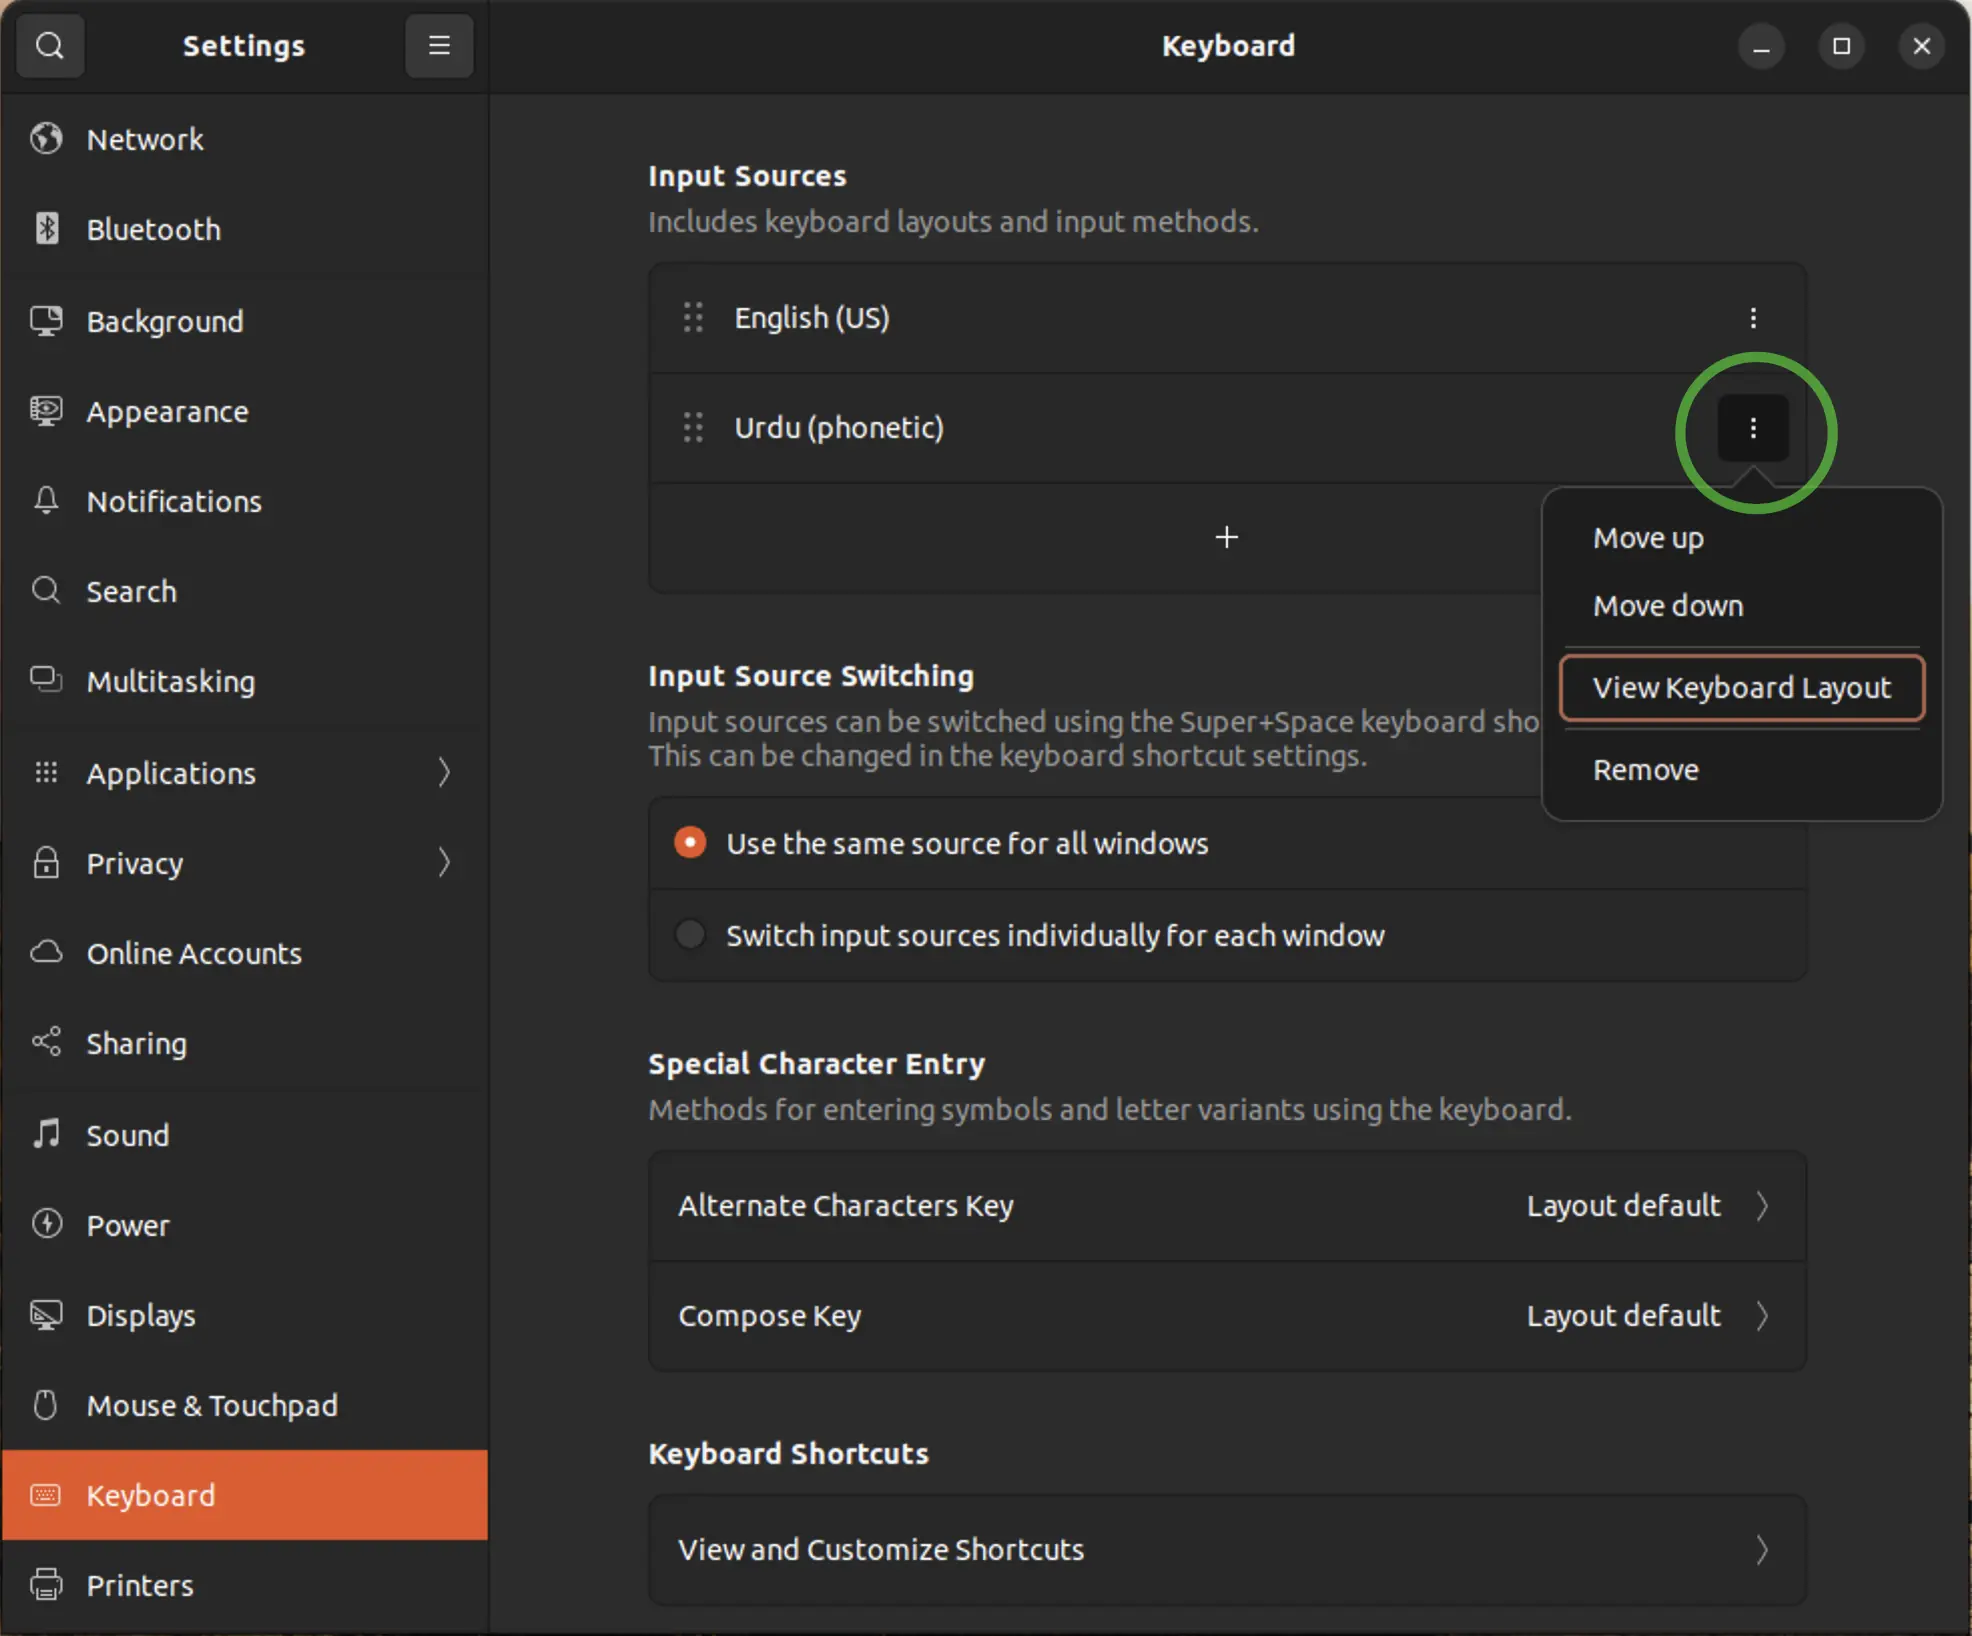
Unlike the in-built keyboard viewers in Mac OS and Windows 11, this is just an image. In other words, you can't click on the different keys—you can only use it as a reference while you're learning the layout.
Try typing in Urdu using one of the built-in word processors (like Text Editor or LibreOffice Writer). As you can see in the image below, it can be helpful to have the keyboard layout image right above (or below) the word processor.
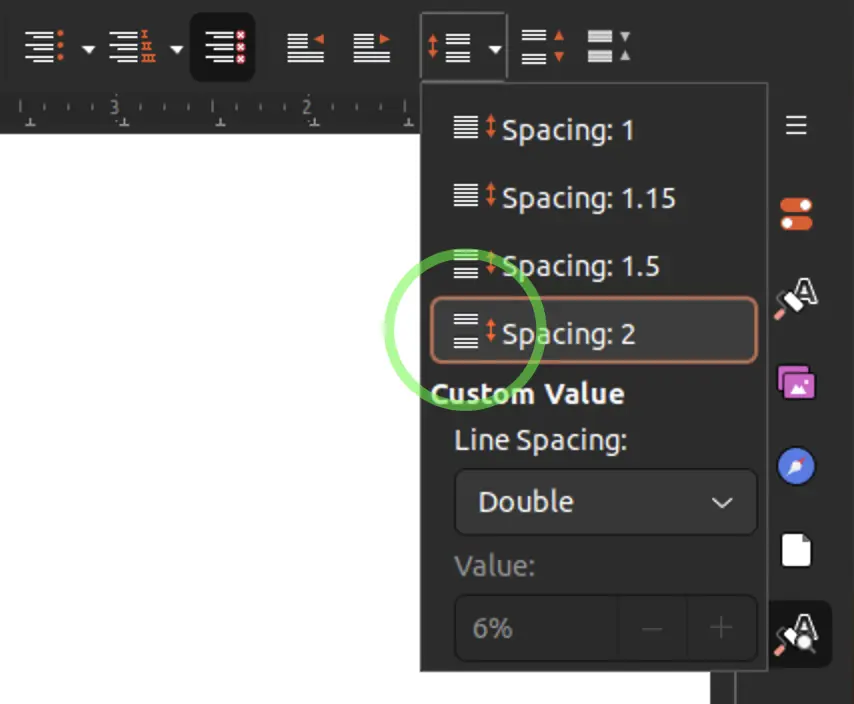
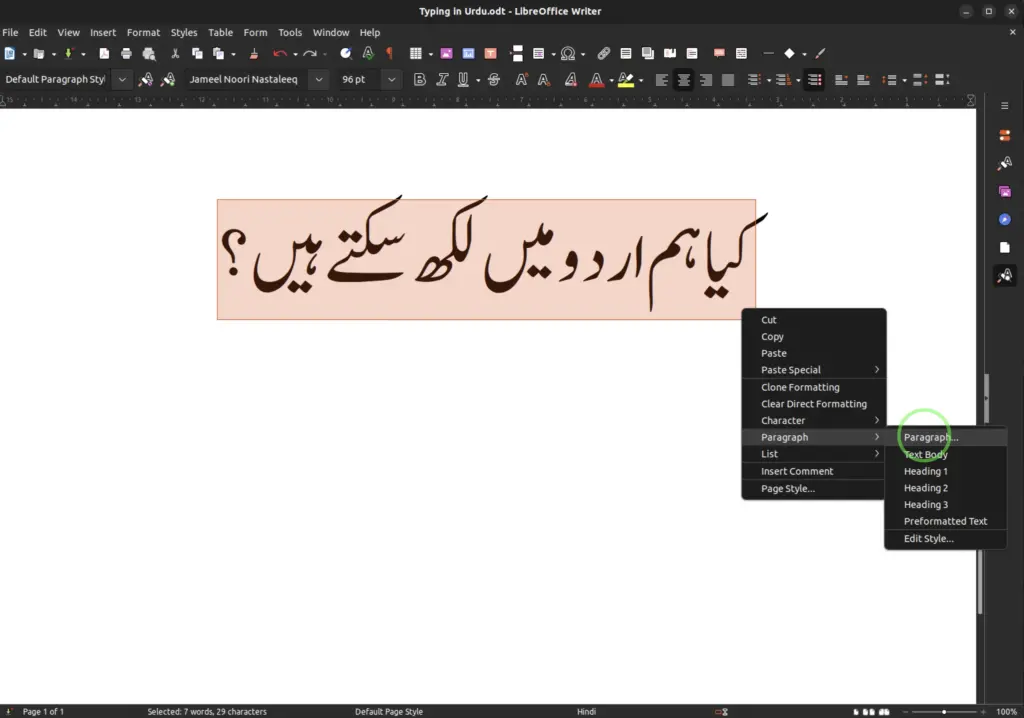
Since Urdu is also a right-to-left language so you'll need to change your document settings accordingly. To do so in LibreOffice Writer, do the following:
- Click on Format.
- Select Paragraph.
- Go to the Alignment tab.
- On the bottom, you'll see Text direction listed under the Properties section.
- Using the drop-down menu, change it to Right-to-Left (RTL).

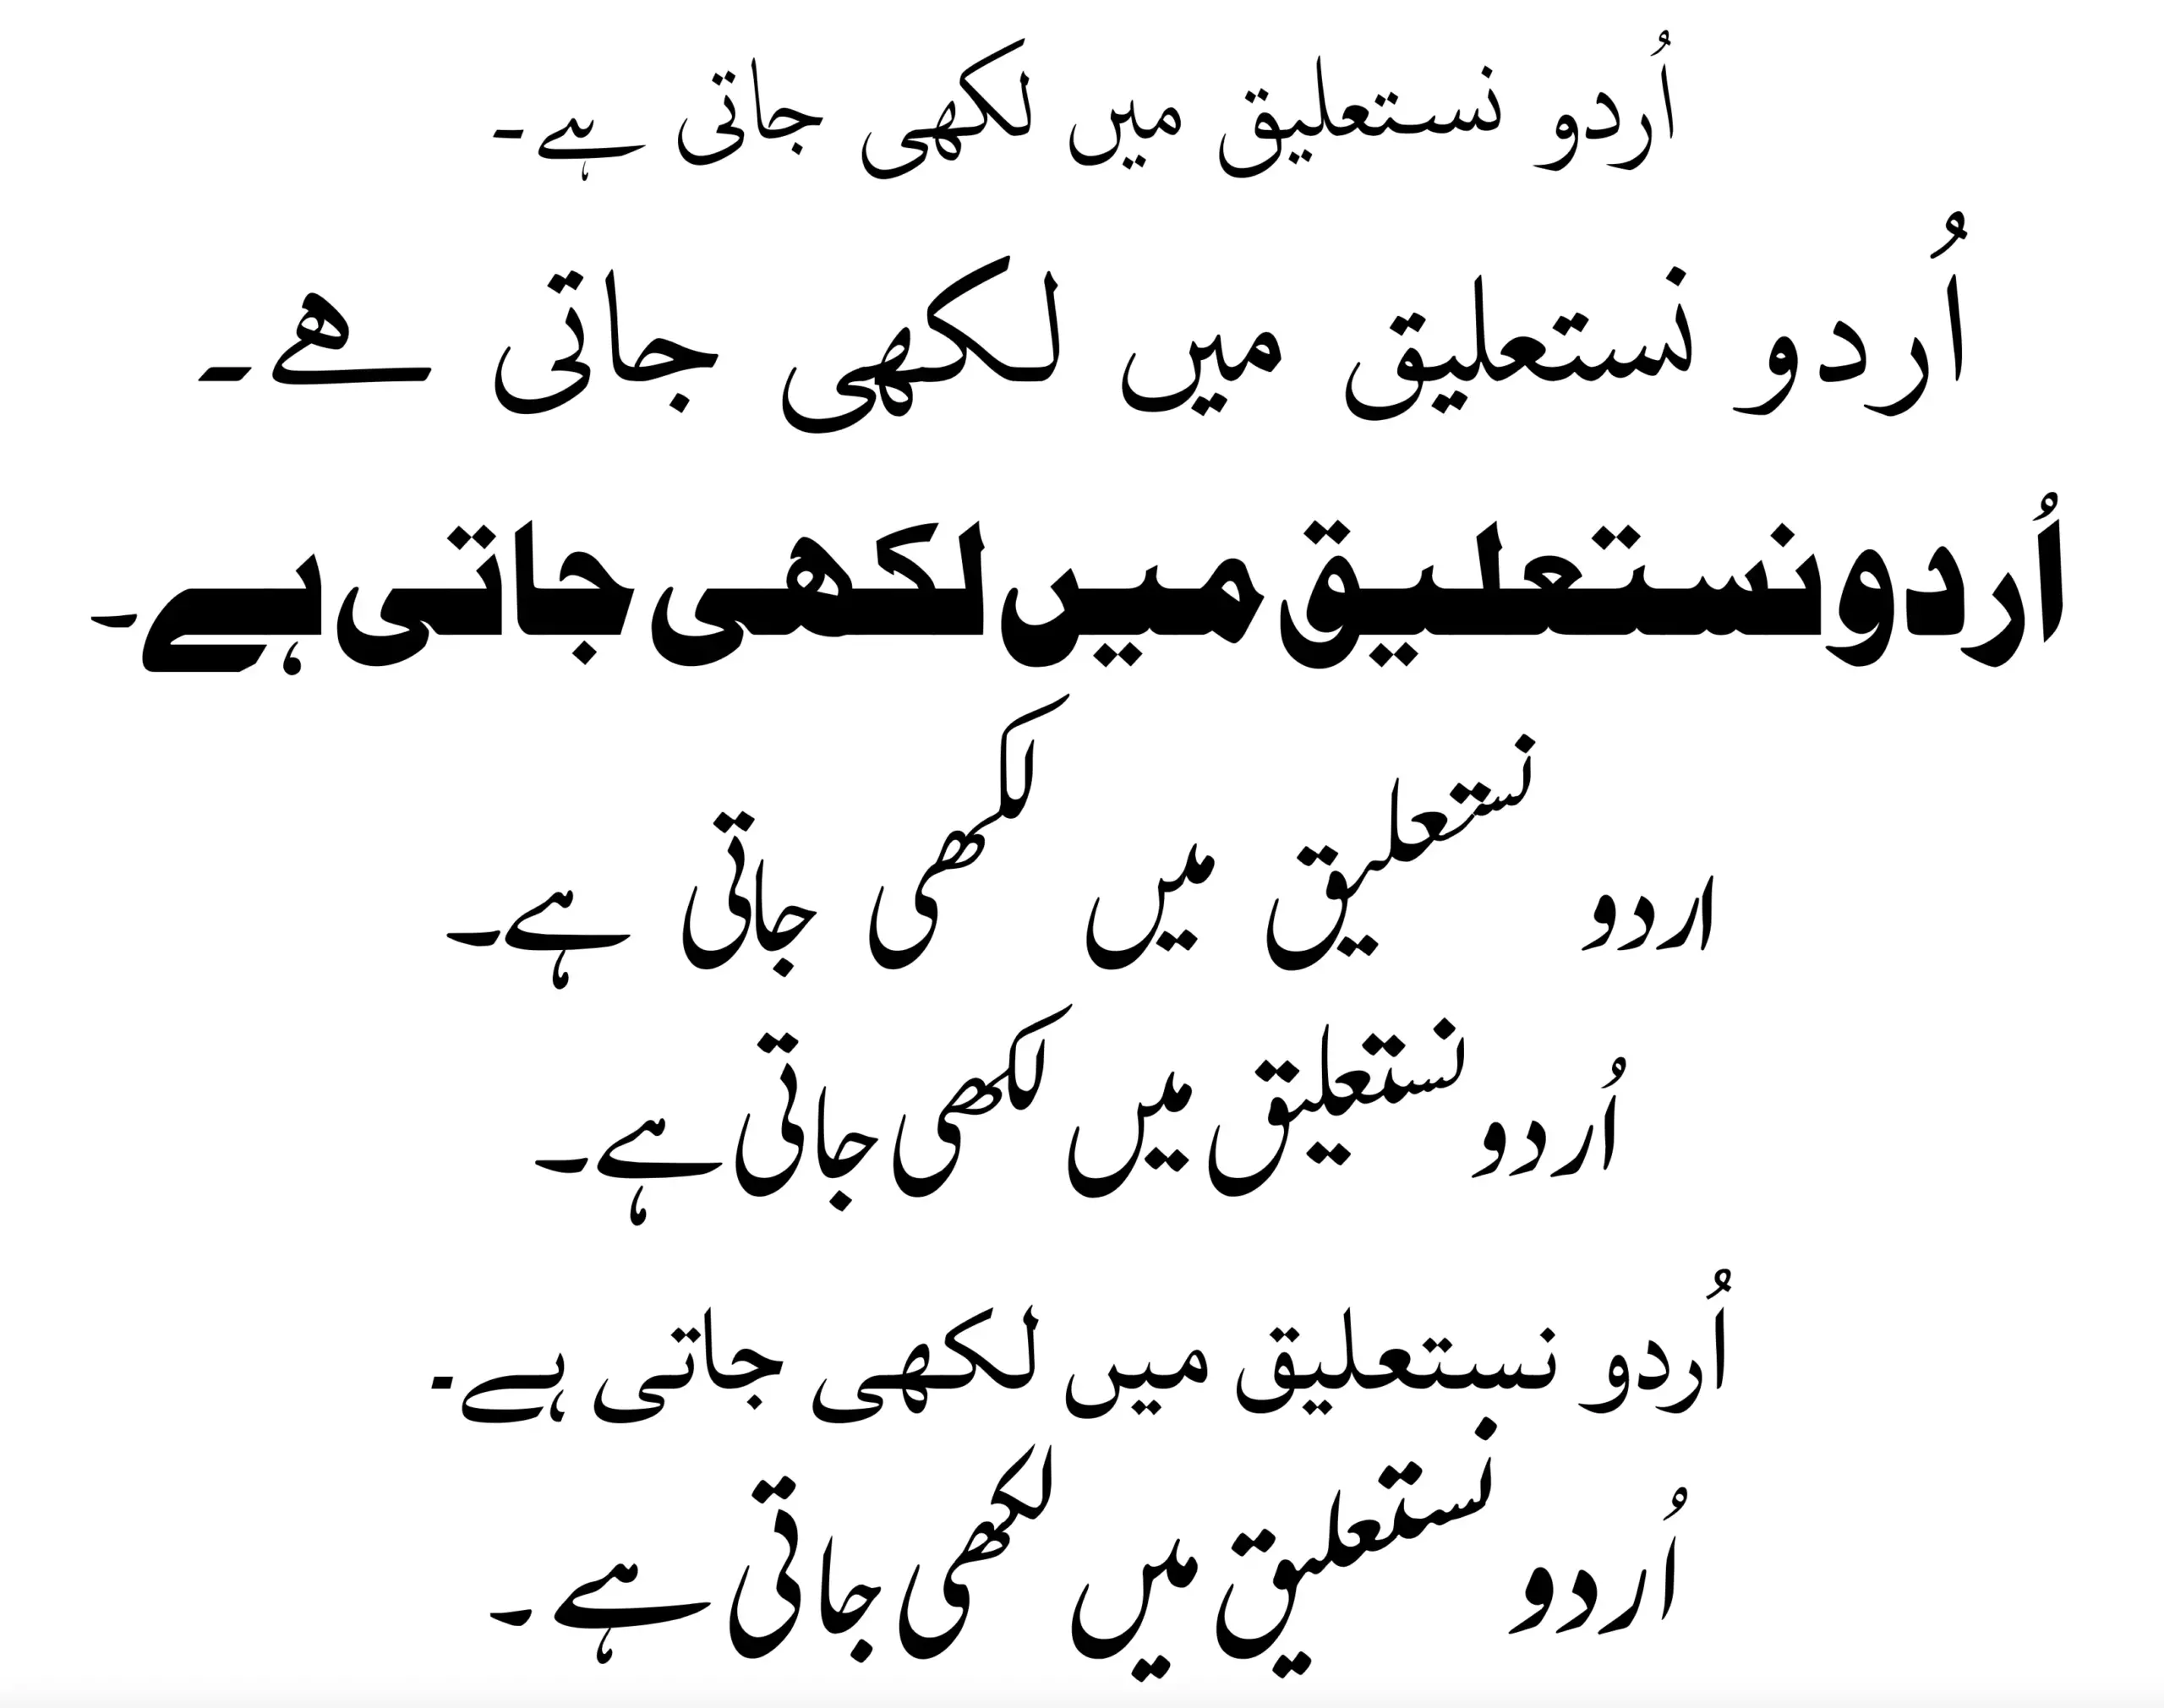
Urdu Fonts
Want to try Urdu fonts other than the system defaults? Head over to my Urdu Fonts page and explore a wide range of fonts available for free download.
Where Can You Type in Urdu?
You can type in Urdu anywhere within Linux - Ubuntu as long as the application supports Unicode text input. This includes:
• Text Editors: Text Editor, LibreOffice Writer, etc.
• Web Browsers: FireFox, etc.
• Email Clients: Thunderbird Mail, etc.
Most modern applications support Unicode, so you should have no trouble typing in Urdu across various platforms and applications.
By following these steps, you’ll be able to type in Urdu on your Linux - Ubuntu computer.


Comments 1
Very useful information. Urdu font resources are always in demand. I found some helpful fonts on jameelnoori.com and urdufontss.net as well. Appreciate your effort.