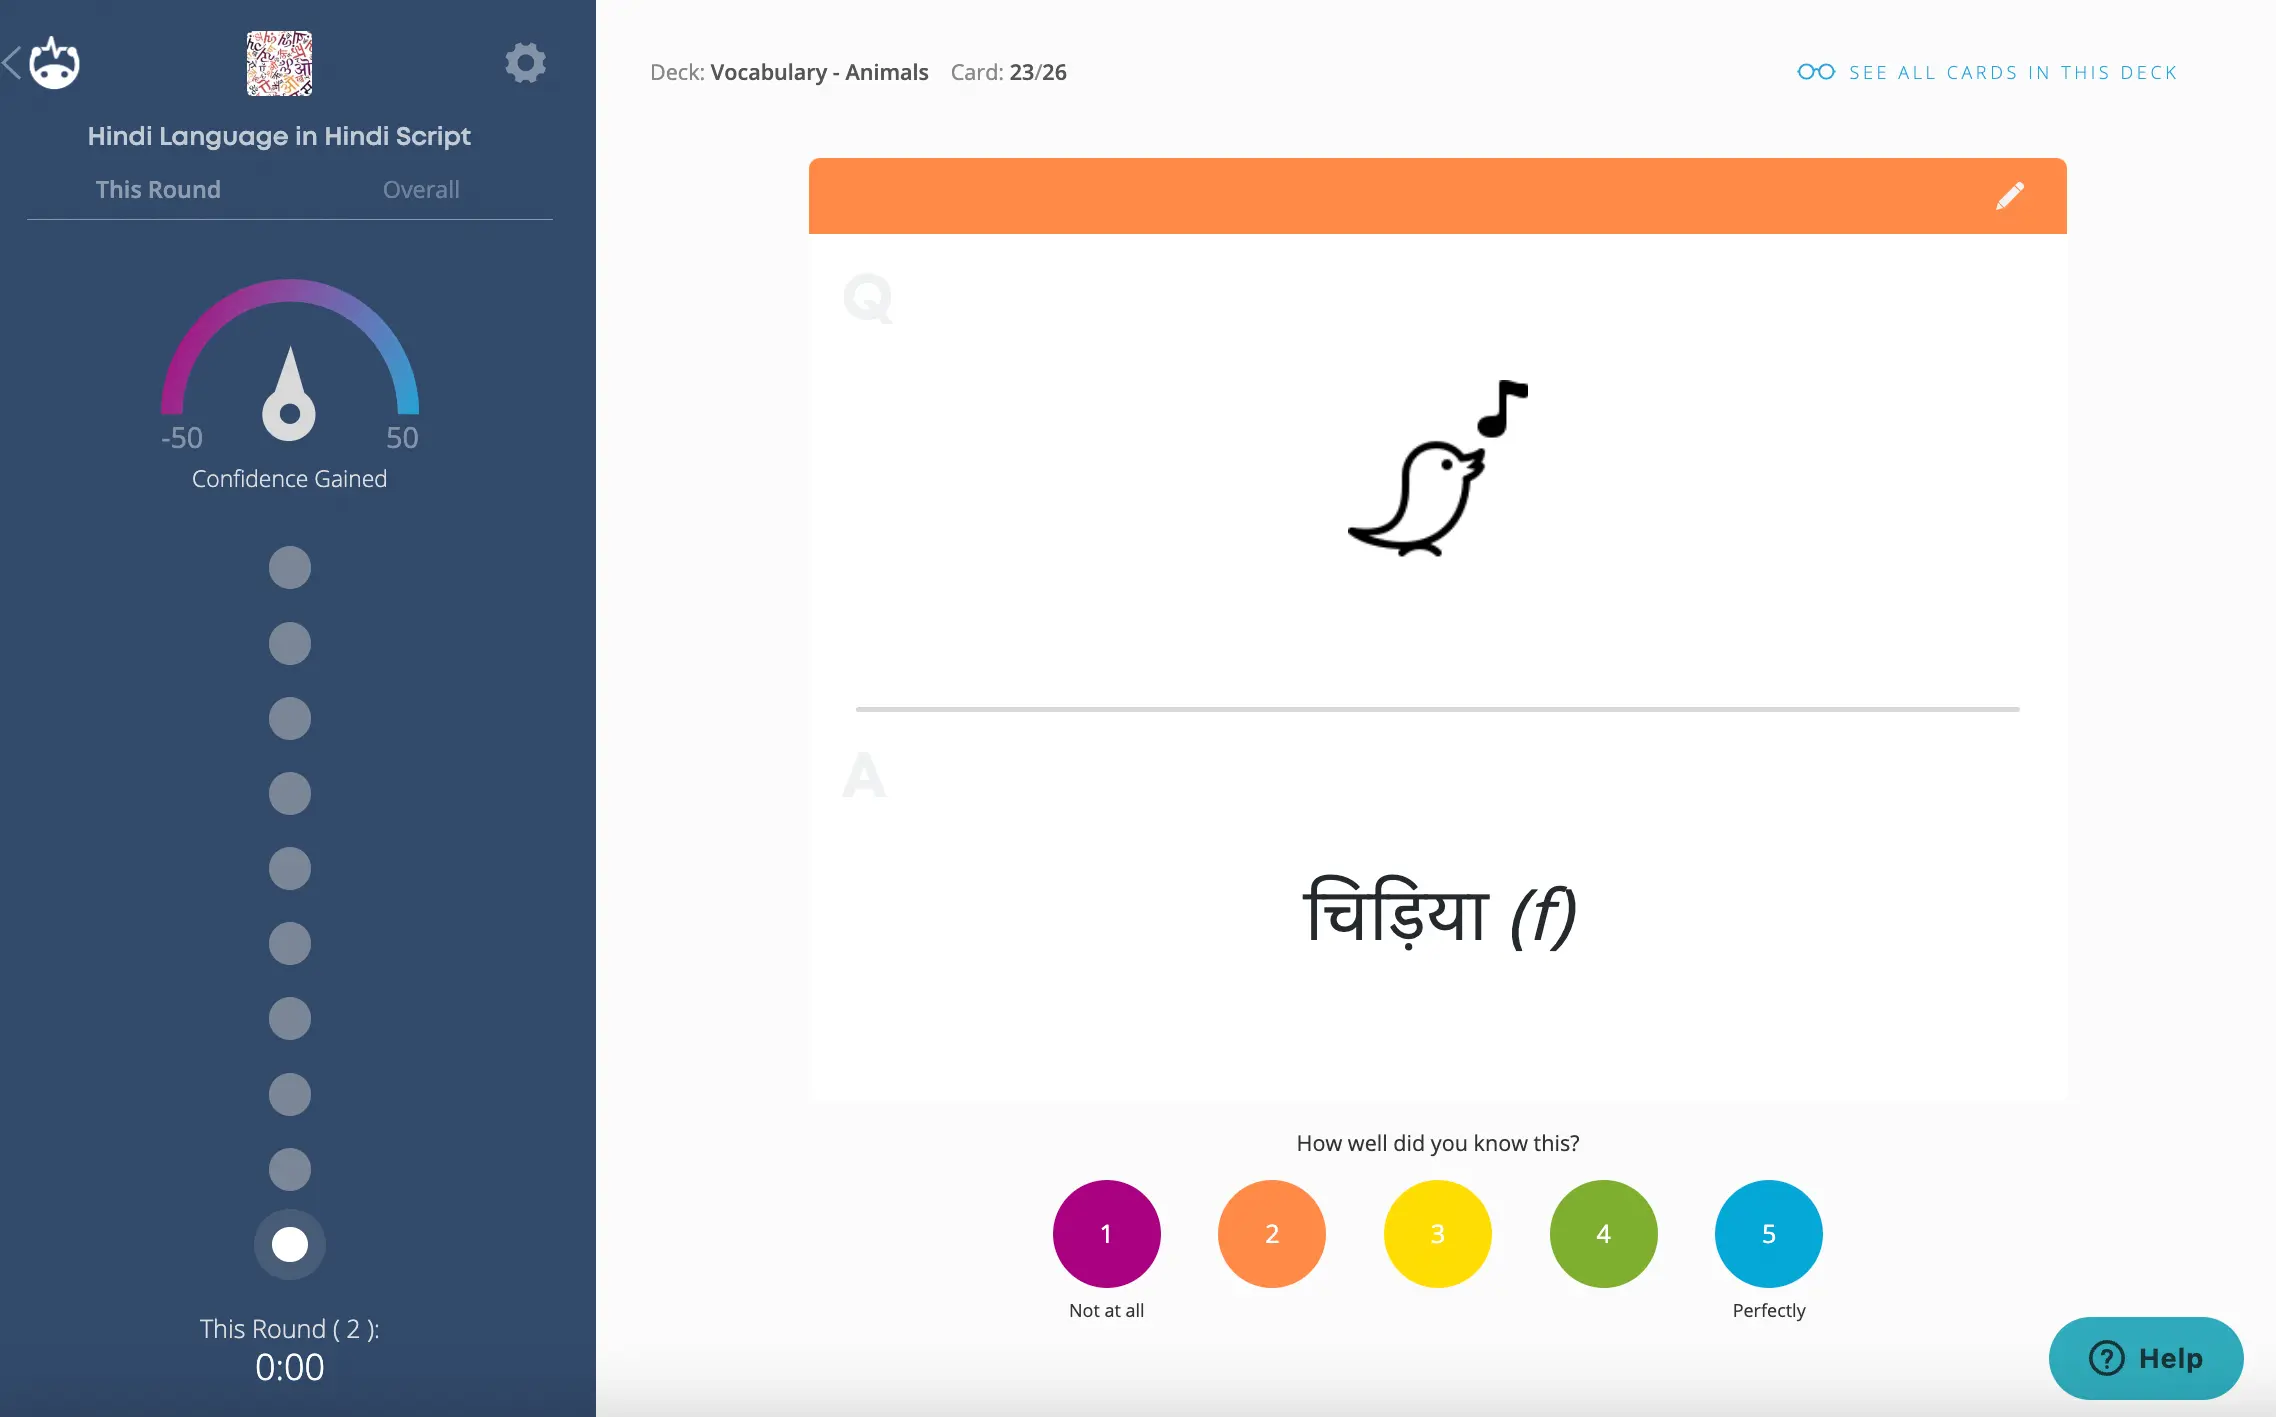
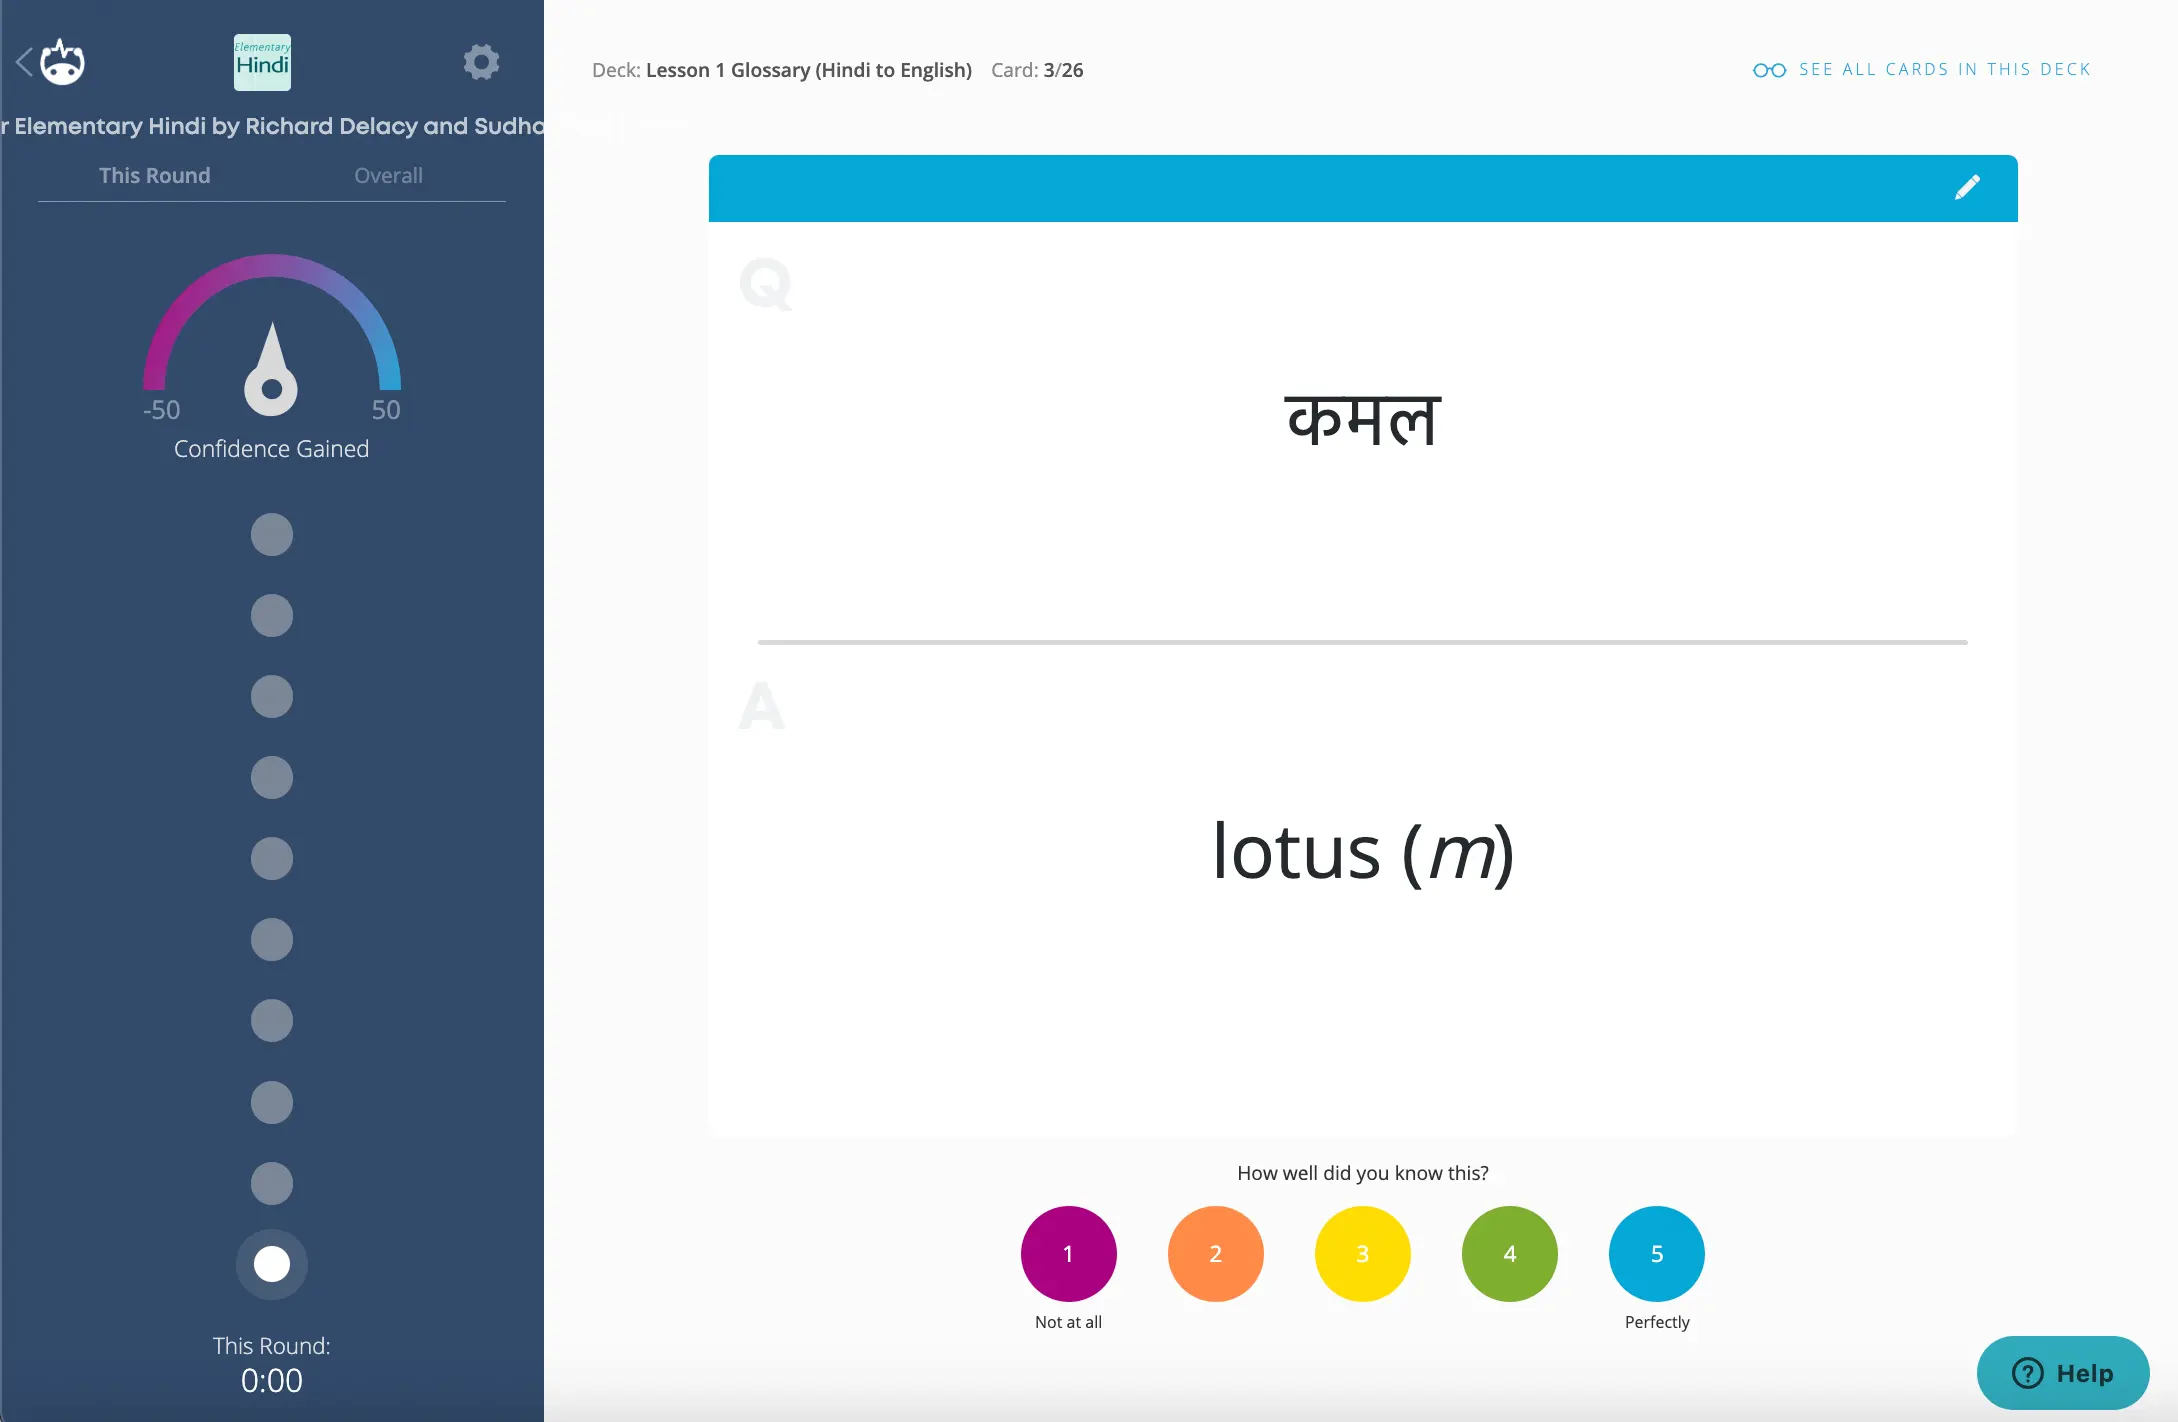
Overview

Typing in Roman Transliteration
#1 - Add Hindi in Settings
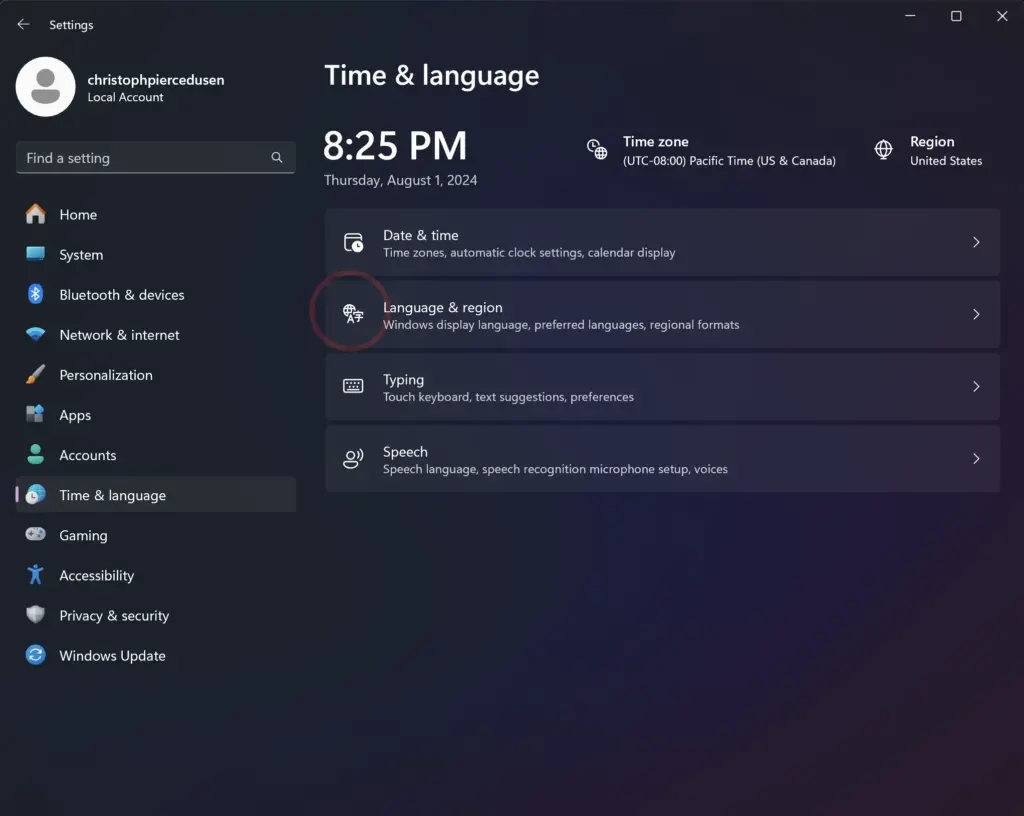
- Click on the Start menu and select the gear icon to open Settings.
- Select Time & language.
- Click on Language & region.
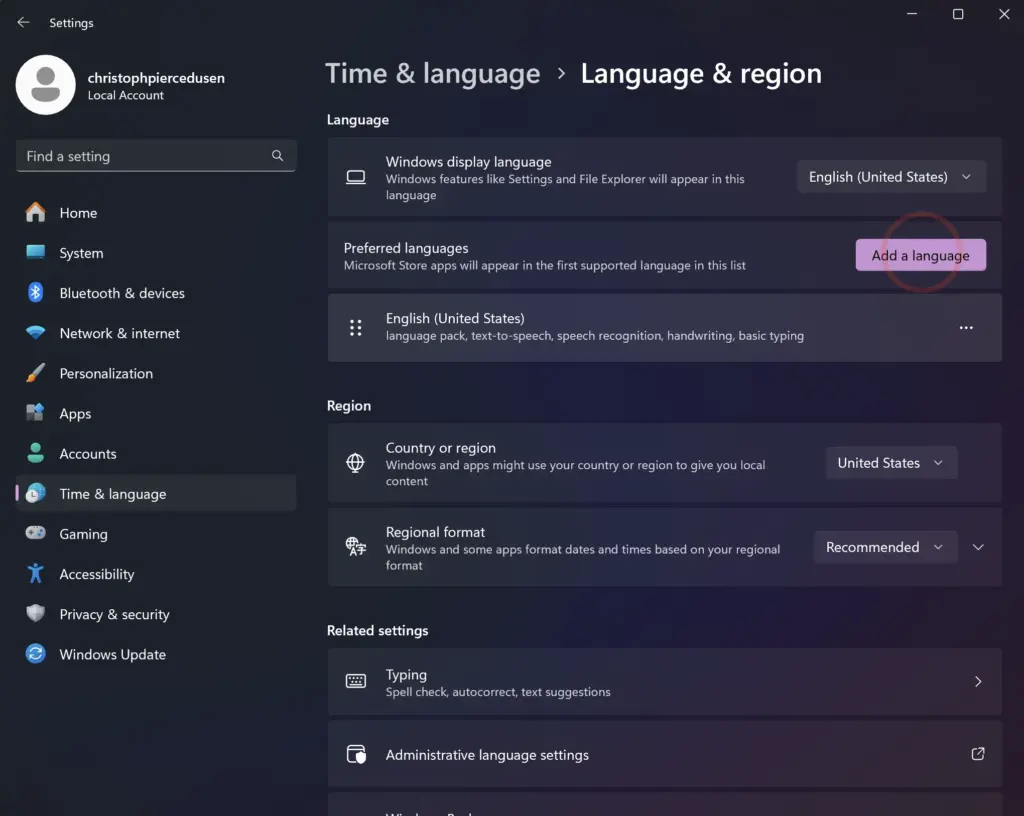
- Under the Preferred languages section, click on Add a language.
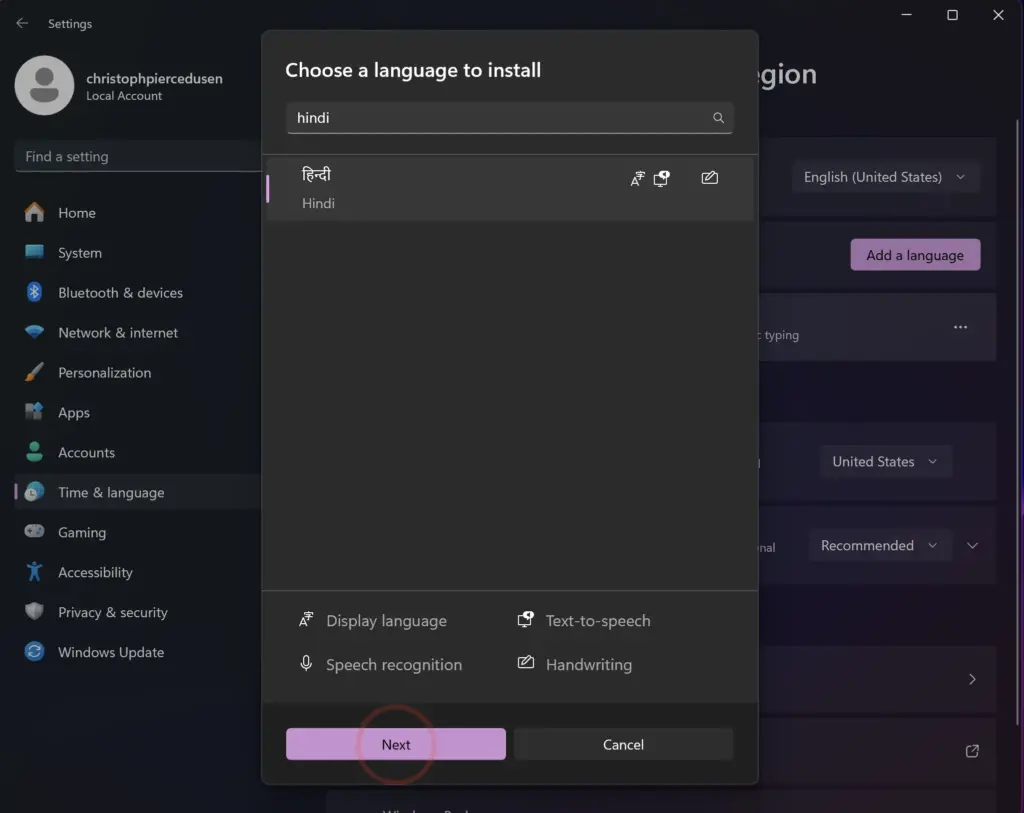
- Scroll through the list or type “Hindi” in the search bar. Click on Hindi and then click Next.
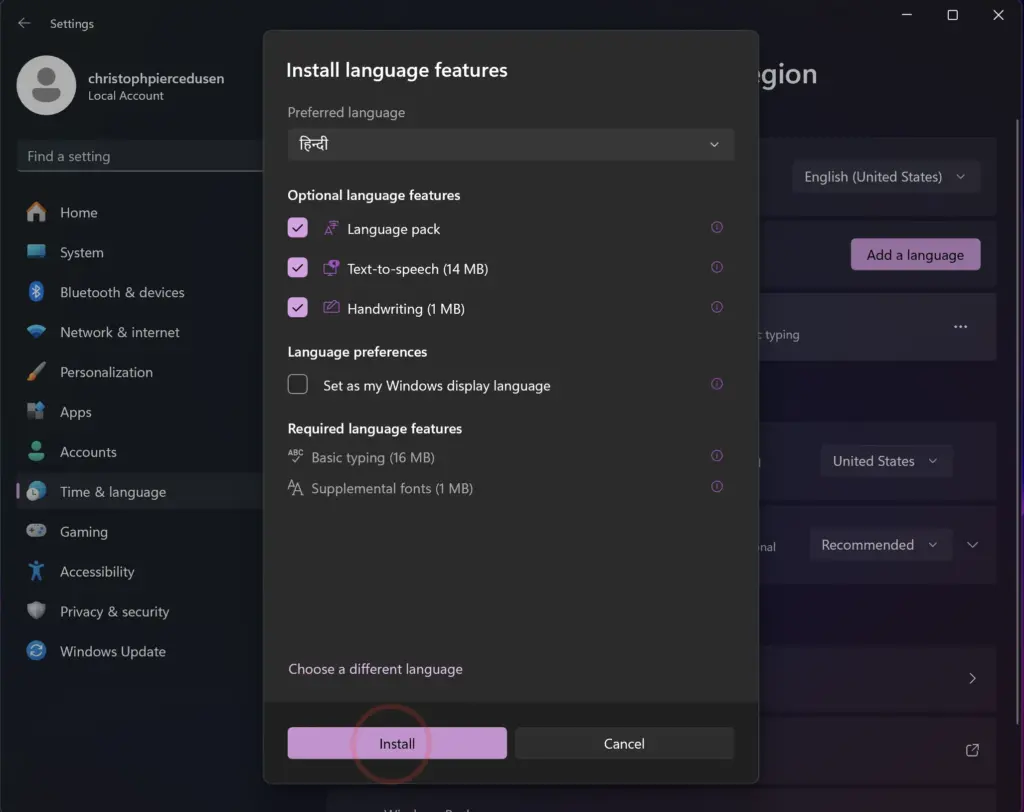
- Click on Install to install the Hindi language pack (if you wish, you may uncheck the features you don't require). You'll need to be connected to the Internet for this step.
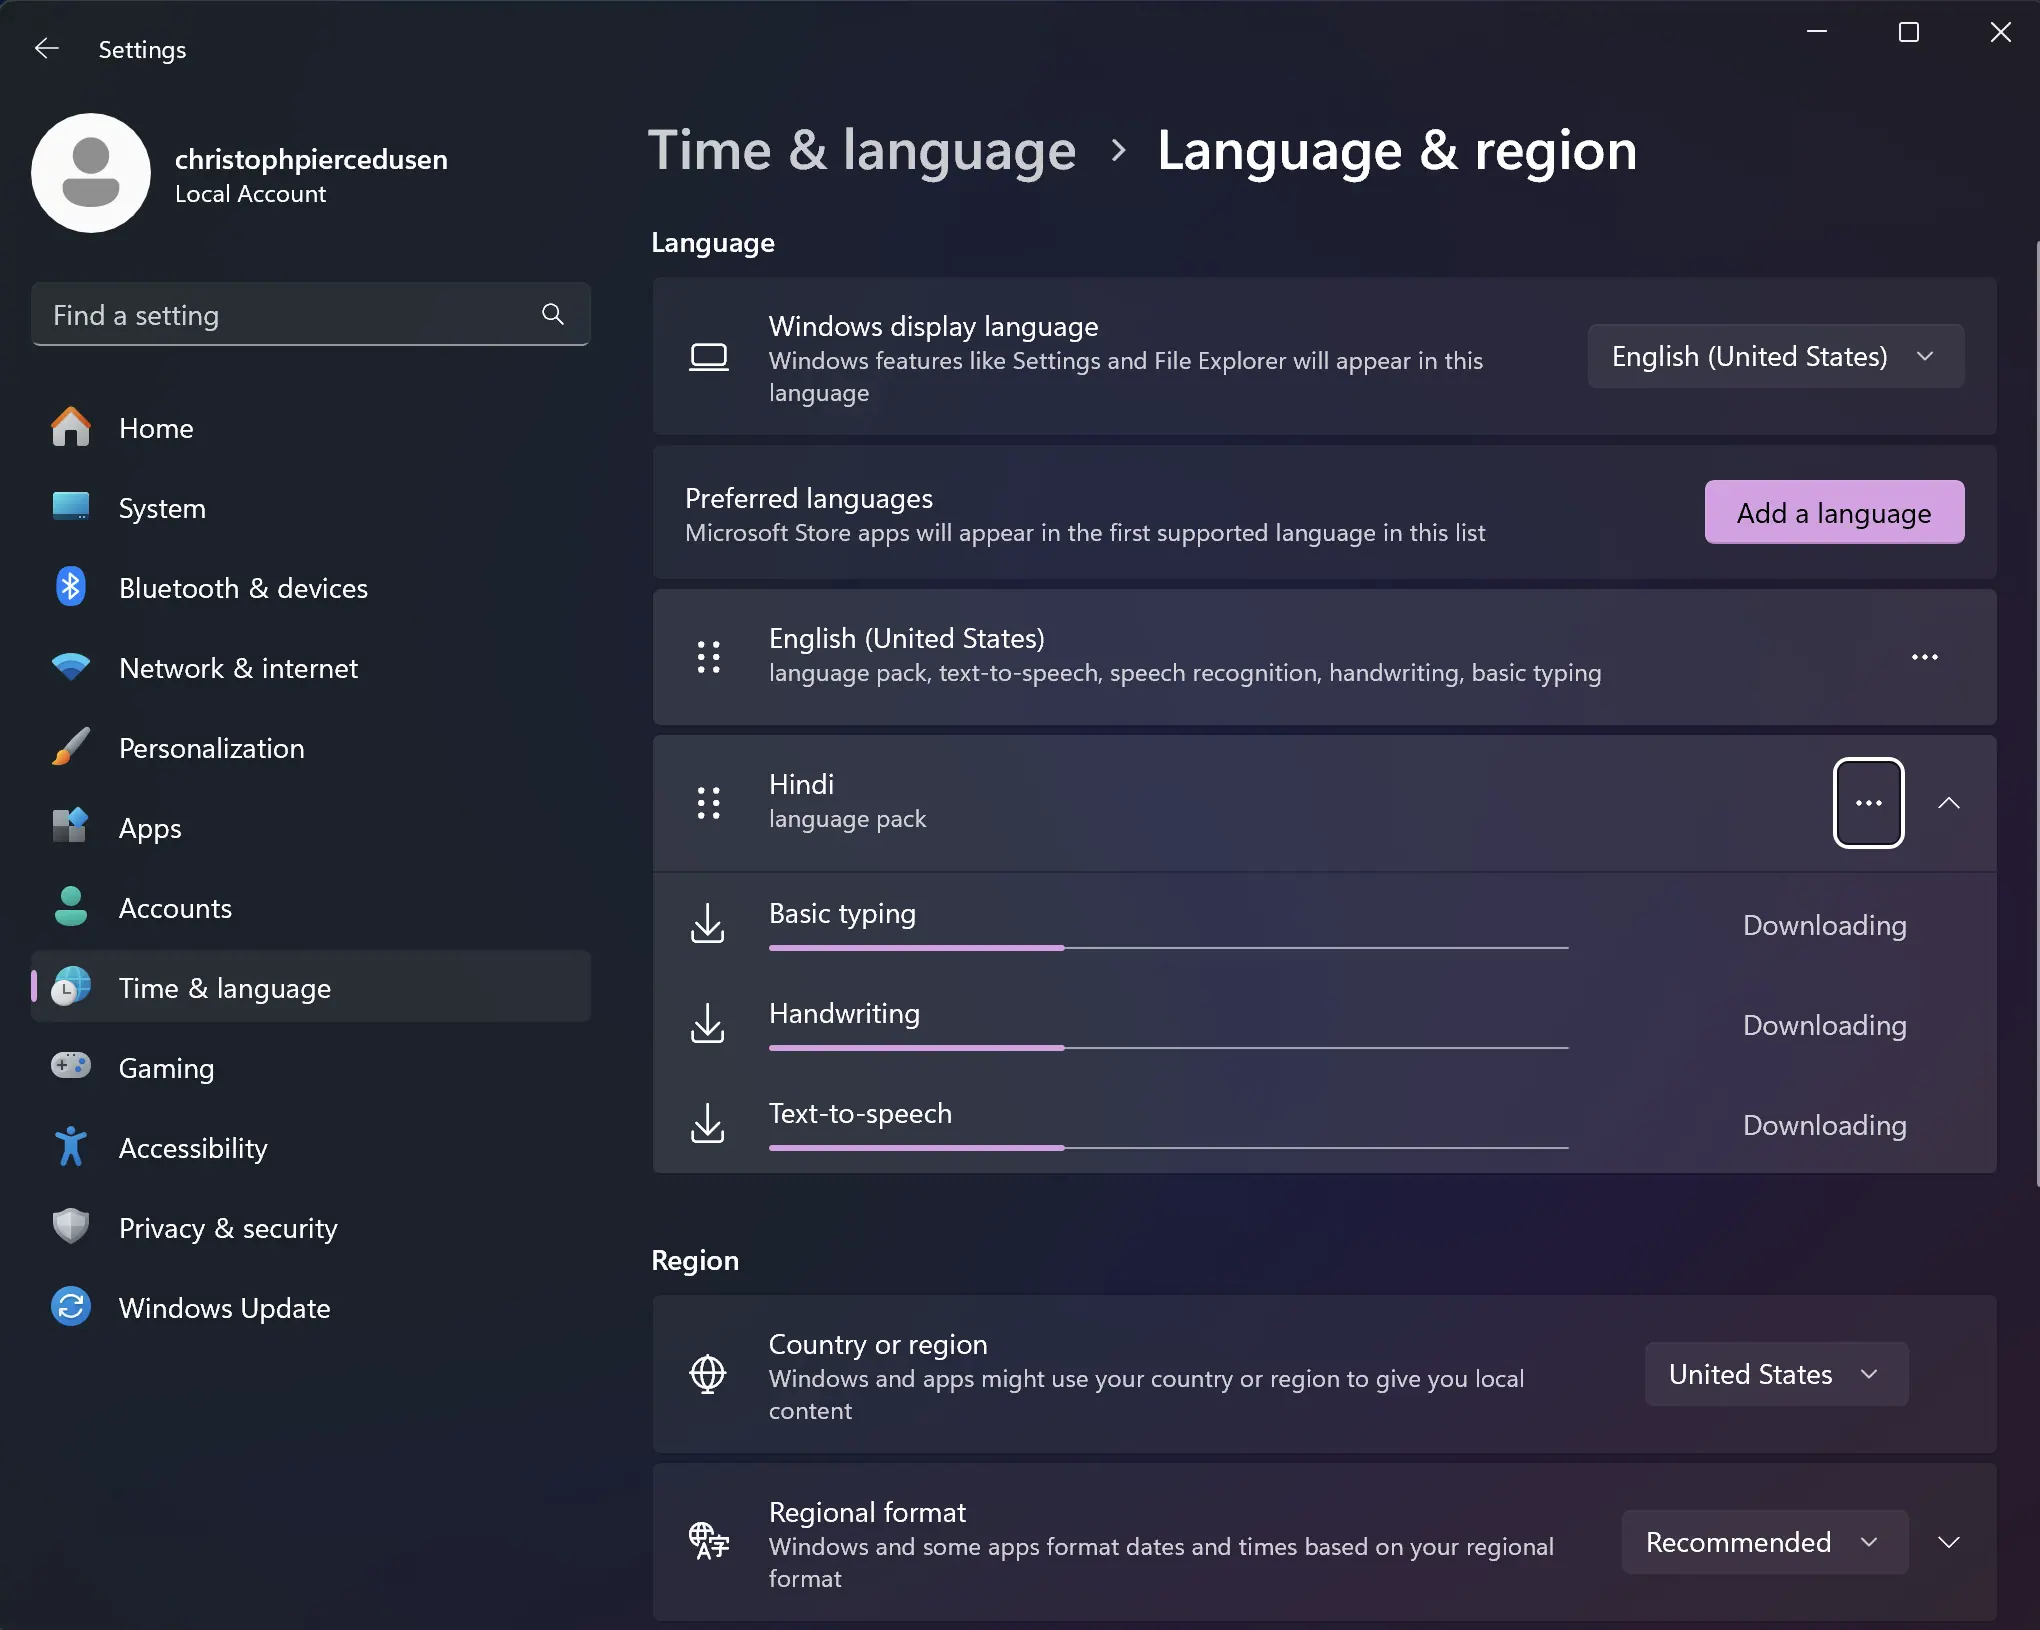
- Wait for the language pack to install (it may take a few minutes).
- When it's finished, you'll see that Hindi is added to your list of Preferred languages.
#2 - Switching Languages
After adding Hindi in Settings, you'll have a few different ways of switching between languages.
Using the Taskbar
Look for the language button on the right side of your taskbar (usually at the bottom right-hand corner of your screen). It typically displays the current input language, such as ENG for English and हि HI for Hindi. Click on it and select Hindi from the menu.
Using a Keyboard Shortcut
You can also switch languages quickly using the keyboard shortcut Windows Key + Space. This will allow you to quickly cycle through the installed languages.

#3 - Choose Your Hindi Keyboard Layout
When you add Hindi, the Hindi Traditional keyboard layout is installed by default but it's not the only keyboard option. Altogether there are three built-in keyboard options and you can add the other two by doing the following:
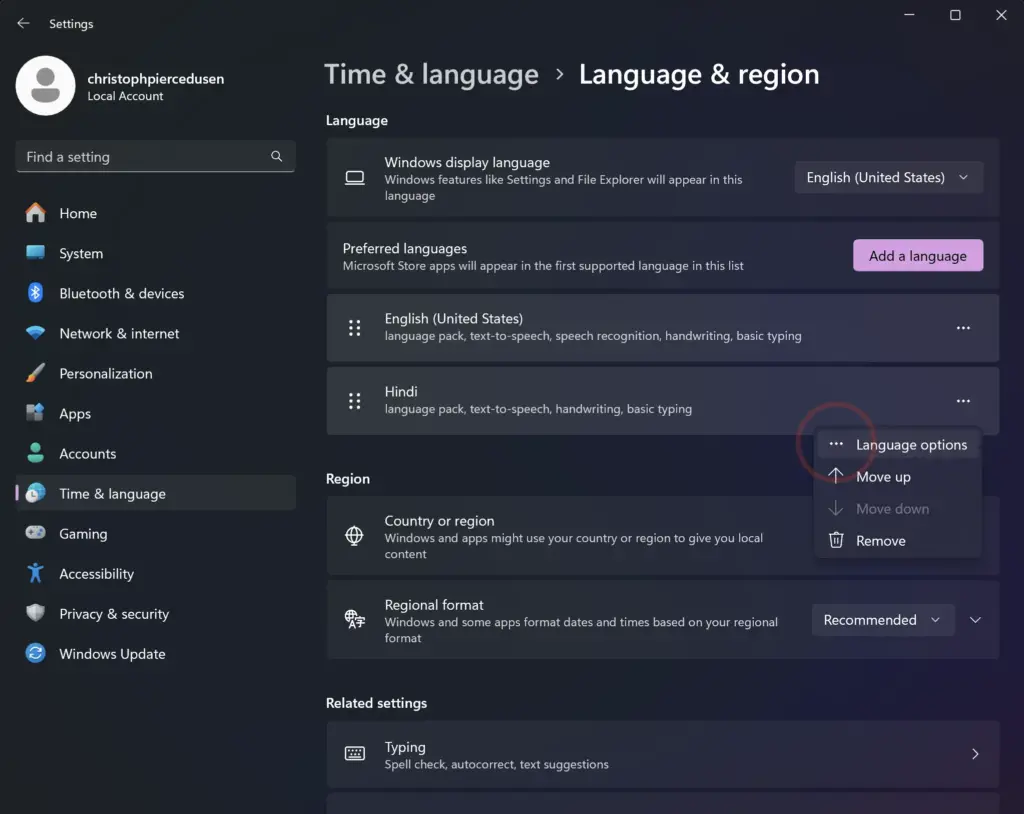
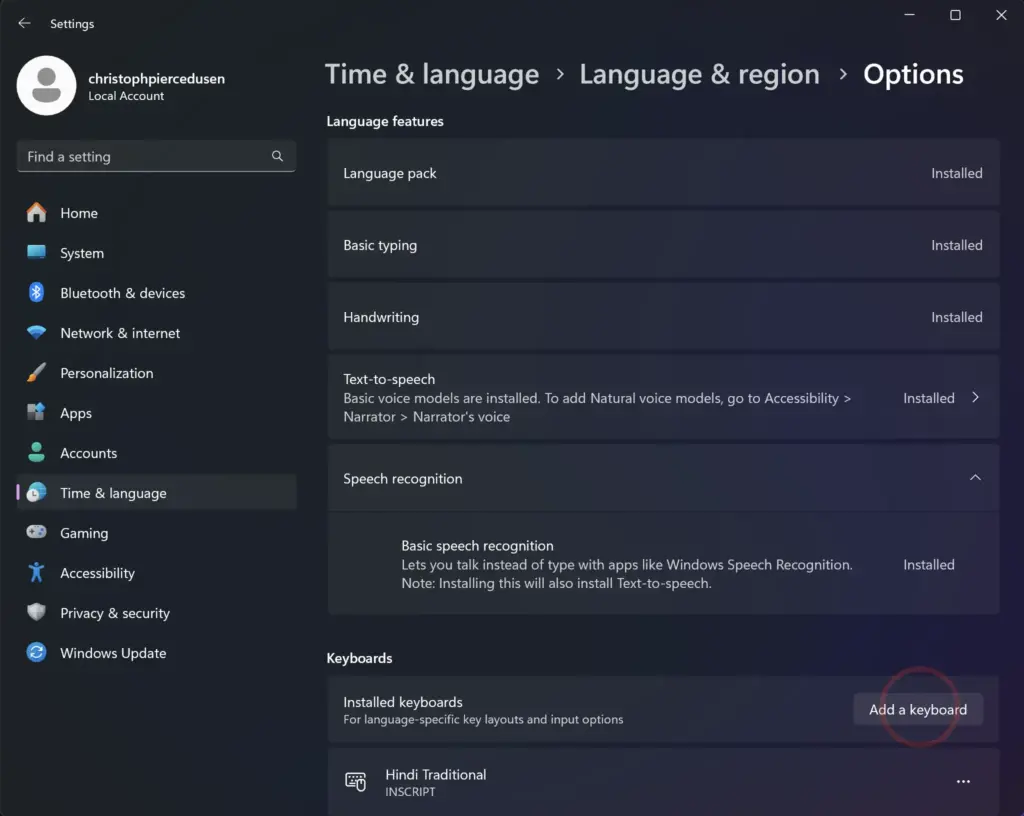
- Go back to Settings —> Time & language —> Language & region.
- Click on the menu on the far-right of Hindi and select Language options.
- Under Keyboards click on Add a keyboard.
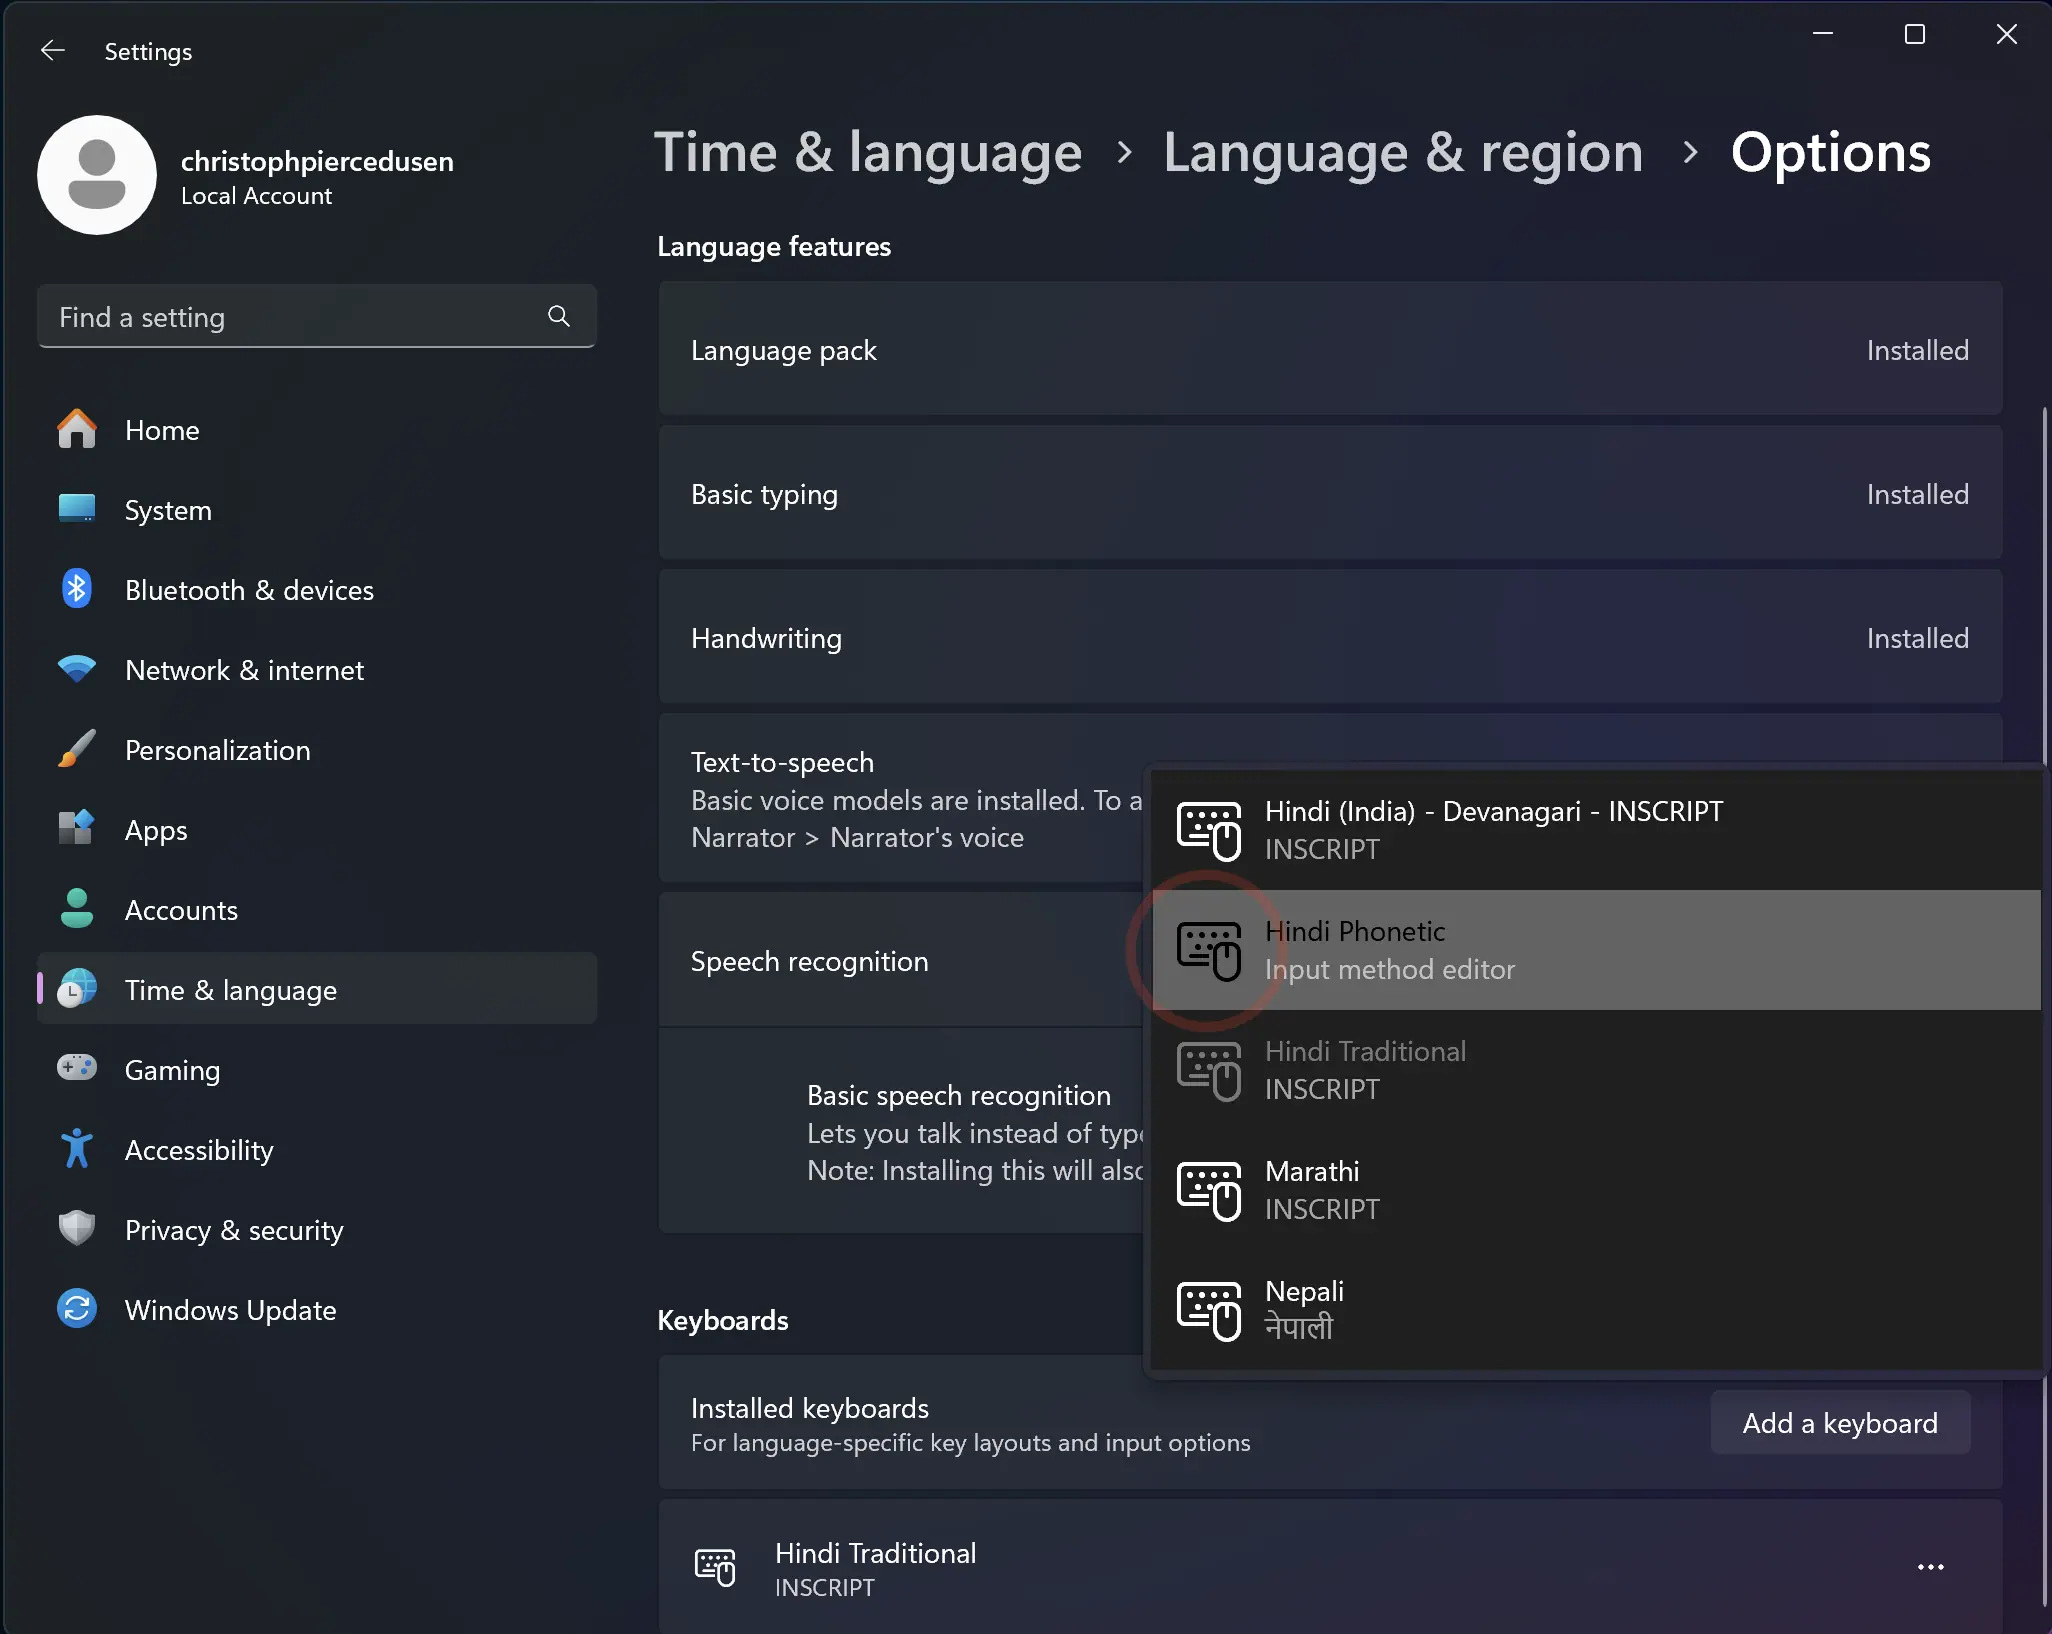
- Click on the keyboards you want to add (the Hindi options are Hindi (India) - Devanagari - INSCRIPT and Hindi Phonetic).
Here's a brief overview of the three keyboard layouts:
1. Hindi Traditional
• This layout is based on the traditional typewriter layout used in India (with some modifications). If you type "k" it'll produce क (ka) and if you type shift+k, it produces ख (kha). However, this layout is not phonetic. For example, to type ब (ba), you type "y" (and then shift+y gives you the aspirated भ) which isn't the most intuitive. In other words, this keyboard has a steep learning curve though I've heard that once you've mastered it, it allows you to type quickly.
2. Hindi (India) - Devanagari - INSCRIPT
• This layout is very similar the Hindi Traditional layout (above), although it takes advantage of a few more keys. Therefore, this keyboard also requires you to invest time to learn the layout.
3. Hindi Phonetic
• This layout allows you to type Hindi using a Romanized version, where the keys correspond to similar sounds in English and the system guesses which word you're trying to type. This keyboard will allow you to start typing in Hindi the fastest. However, it does have its limitations. For instance, it doesn't seem to consistently offer dotted consonants. When trying to type ख़ुशी (khuśī), I could only get it to produce खुशी (khuśī). This layout is great for speed and casual typing in Hindi but not when you need an exact solution.
#4 - Typing in Hindi
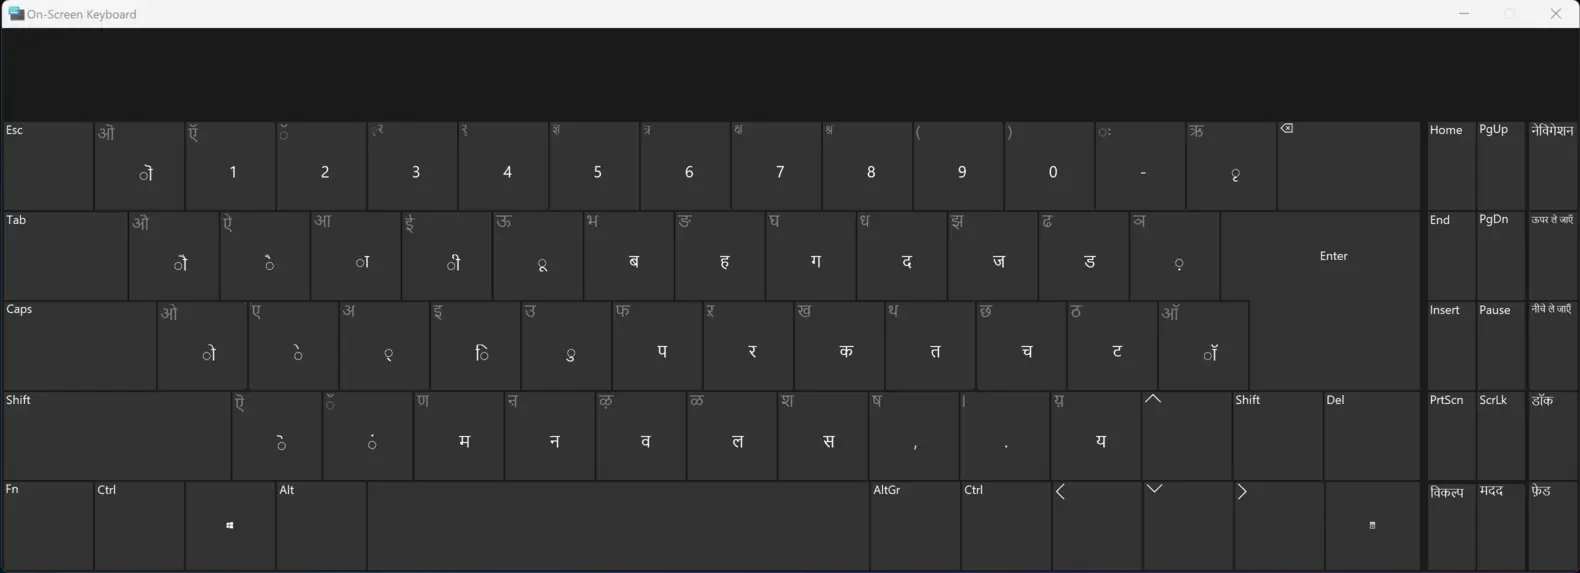
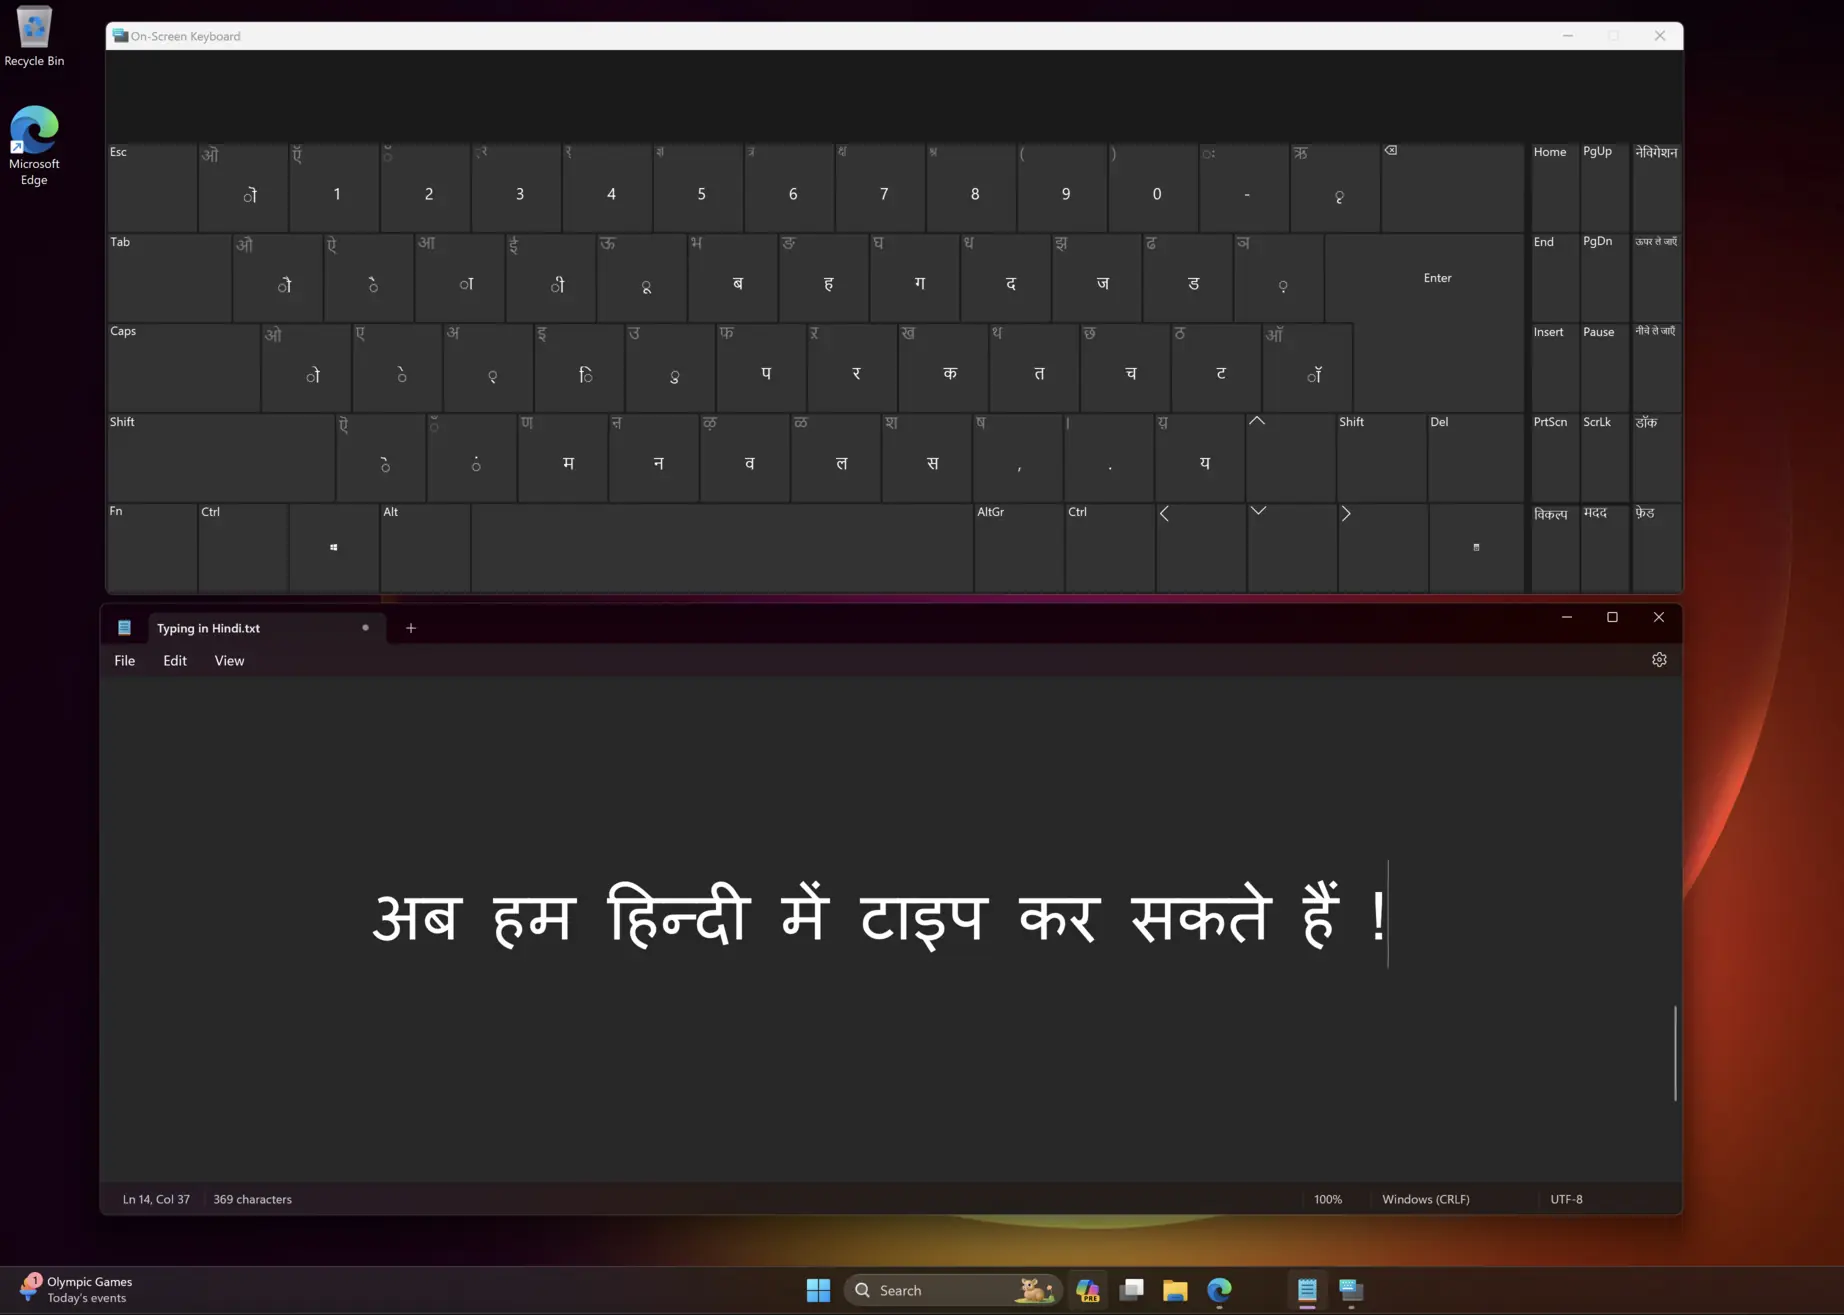
Once you’ve switched to the Hindi keyboard, you can start typing in Devanāgarī. If you’re unfamiliar with the keyboard layout, you might find the Windows 11 on-screen keyboard helpful.
Here's how to enable the on-screen keyboard:
1. Enable the On-Screen Keyboard
• Right-click on the taskbar and select Taskbar settings.
• Scroll down to Touch keyboard and turn it on.
• Alternatively, you can go to Settings > Ease of Access > Keyboard and toggle on Use the On-Screen Keyboard.
2. Switch to the Hindi Keyboard Layout
• Click on the language button on the taskbar and select Hindi.
• Open the on-screen keyboard by clicking on the keyboard icon in the taskbar.
3. Start Typing in Hindi
• The on-screen keyboard will display the Hindi layout. You can click on the keys to type in Hindi or just use them for reference.
Hindi Fonts
Windows 11 uses the Mangal font by default for Hindi and other Devanāgarī script languages. Mangal is a Unicode font designed specifically for the Devanāgarī script, ensuring that characters are displayed correctly across different applications and platforms.
In addition to Mangal, you may consider using these fonts for a different look or for specific needs (you should find all of these pre-installed in Windows 11):
Mangal: The default font for Hindi in Windows 11.

Kokila: A Unicode font that offers a clean and modern look for Hindi text.

Nirmala UI: Part of the Nirmala UI font family, this is another clean and modern-looking font.

Aparajita: A Unicode font with a more traditional and stylized appearance.

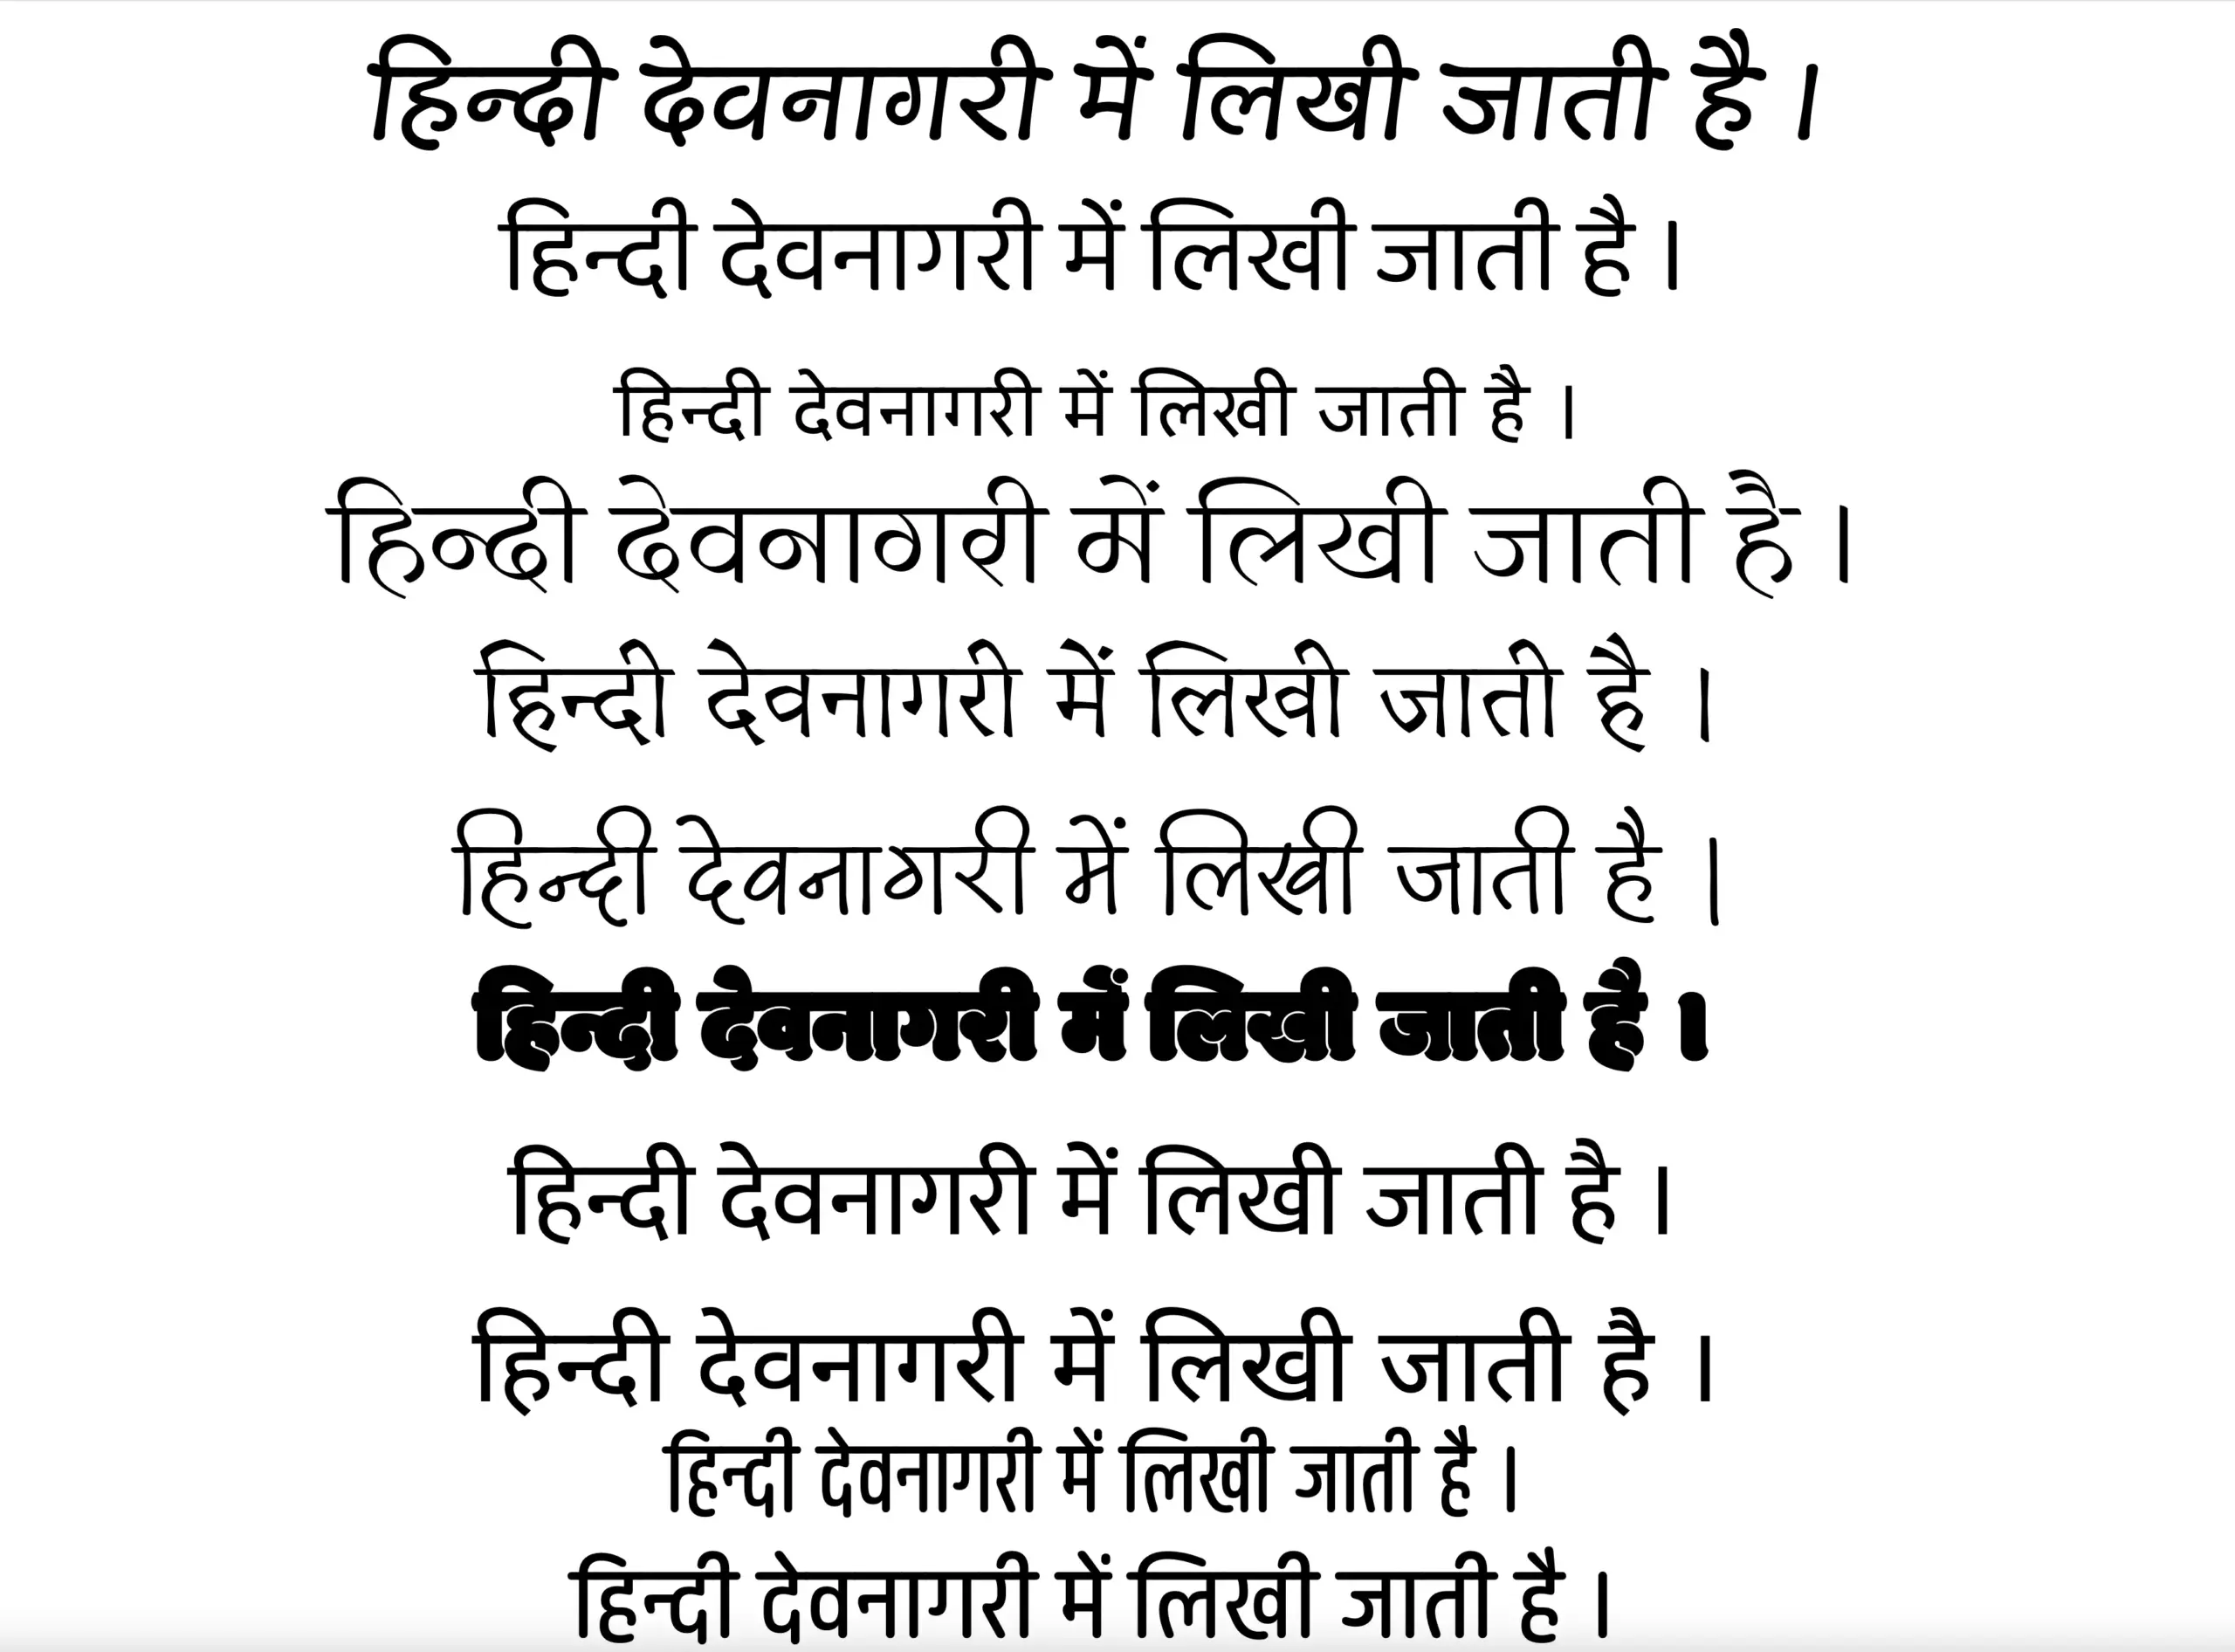
Want to try Hindi fonts other than the system defaults? Head over to my Hindi Fonts page and explore a wide range of fonts available for free download.
Where Can You Type in Hindi?
You can type in Hindi anywhere within Windows 11 as long as the application supports Unicode text input. This includes:
• Text Editors: Notepad, WordPad, Microsoft Word, etc.
• Web Browsers: Typing in search bars, forms, and text fields.
• Messaging Apps: Microsoft Teams, Skype, etc.
• Social Media: Facebook, Twitter, Instagram, etc.
• Email Clients: Outlook, Gmail (via web browser), etc.
Most modern applications support Unicode, so you should have no trouble typing in Hindi across various platforms and applications.
By following these steps, you’ll be able to type in Hindi on your Windows 11 computer. Happy typing!